Deze versie kan foutieve bewerkingen bevatten. Schakel over naar de recentste gecontroleerde momentopname.
Wat je nodig hebt
-
Deze stap is niet vertaald. Help het te vertalen
-
With the Generally Disassembly completed, you may proceed to floppy drive installation.
-
-
Deze stap is niet vertaald. Help het te vertalen
-
Remove the plastic panel at the bottom of the display.
-
-
Deze stap is niet vertaald. Help het te vertalen
-
Reverse the computer to access the peripheral panel in the back.
-
Remove the two T8 Torx screws on either side of the bar code panel.
-
-
-
Deze stap is niet vertaald. Help het te vertalen
-
Reverse the computer to have the monitor and mousepad facing you.
-
Remove the plastic panel underneath the display.
-
-
Deze stap is niet vertaald. Help het te vertalen
-
Remove the three T8 Torx screws securing the floppy drive to the frame.
-
-
Deze stap is niet vertaald. Help het te vertalen
-
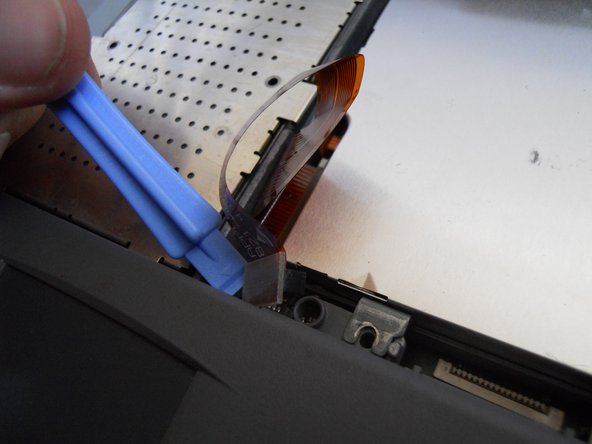
Using a spudger, lift the plastic tabs on the floppy drive securing the ribbon cable to the ribbon port.
-
-
Deze stap is niet vertaald. Help het te vertalen
-
Lift the defective floppy drive from the body of the computer.
-
-
Deze stap is niet vertaald. Help het te vertalen
-
Replace the defective drive with a new drive.
-
Follow these instructions in reverse order to reassemble the device.
-


Annuleren: ik heb deze handleiding niet afgemaakt.
2 andere personen hebben deze handleiding voltooid.

Team

Cal Poly, Team 20-66, Walters Spring 2011 Lid van Cal Poly, Team 20-66, Walters Spring 2011
CPSU-WALTERS-S11S20G66
4 Leden
3 handleidingen geschreven
Één opmerking
Does anyone know where I can actually find another FDD for this PowerBook? Because I think i broke mine ((