Deze handleiding heeft recentere wijzigingen. Schakel over naar de nieuwste niet-geverifieerde versie.
Inleiding
This will show you how to remove the outer case so you can make replacements within the device.
Wat je nodig hebt
-
-
Use a blow dryer or heat gun on a medium to high heat setting on the back pad to loosen the glue that attaches it to the device.
-
-
-
-
After removing the back pad, unscrew the five 5 mm Phillips #00 screws in the large, deep holes in the plastic casing. The plastic casing should come off easily after removing all the screws.
-
-
-
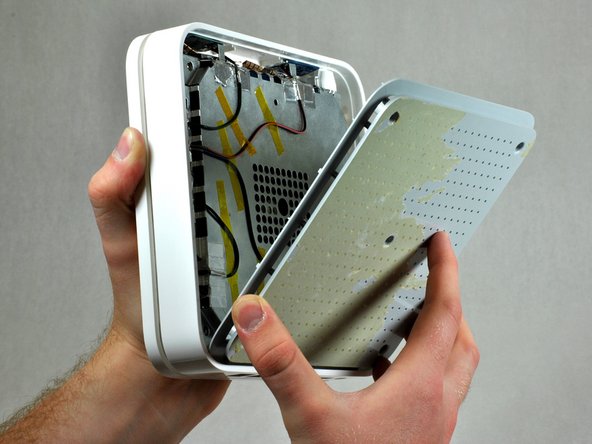
Insert a narrow plastic opening tool into one of the notches. Apply moderate force to pull the metal casing from the plastic outer casing. You can use the rim of the outer case as leverage. You should hear a click when the metal casing detaches.
-
After you hear the click, remove the inner metal case from the outer case using your hands. It should not take very much force.
-


To reassemble your device, follow these instructions in reverse order.
To reassemble your device, follow these instructions in reverse order.
Annuleren: ik heb deze handleiding niet afgemaakt.
Één andere persoon heeft deze handleiding voltooid.
Team

Cal Poly, Team 10-37, Amido Fall 2014 Lid van Cal Poly, Team 10-37, Amido Fall 2014
CPSU-AMIDO-F14S10G37
4 Leden
12 handleidingen geschreven