Ga door naar hoofdinhoud

Andobil Easy Clip Car Mount Replacement

Wat je nodig hebt

  1. Andobil Easy Clip Car Mount Replacement, Car Mounting Clip: stap 1, afbeelding 1 van 1
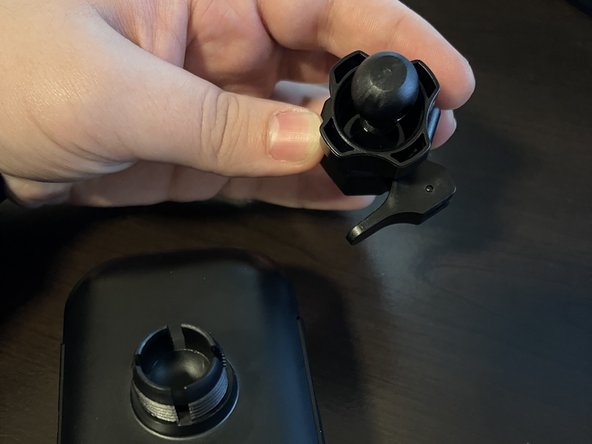
    • In this case, the plastic connecting to the metal spring failed and caused one of the clip arms to break off.

    • Be sure to remove any pieces of broken plastic before you begin the fix.

  2. Andobil Easy Clip Car Mount Replacement: stap 2, afbeelding 1 van 1
    • Loosen the knob on the back of the phone holder.

    • Be sure to hold on to this knob as it will be integral to the rest of the fix.

  3. Andobil Easy Clip Car Mount Replacement: stap 3, afbeelding 1 van 2 Andobil Easy Clip Car Mount Replacement: stap 3, afbeelding 2 van 2
    • Once the knob is fully removed, the inside ball joint loosens up and can be moved around.

    • Remove the ball joint from the base of the phone holder.

  4. Andobil Easy Clip Car Mount Replacement: stap 4, afbeelding 1 van 1
    • Remove the tightening knob and set the broken clip aside or toss it in the trash.

  5. Andobil Easy Clip Car Mount Replacement: stap 5, afbeelding 1 van 2 Andobil Easy Clip Car Mount Replacement: stap 5, afbeelding 2 van 2
    • Locate the replacement clip that comes with the Andobil Easy Clip Car Mount Kit.

    • Put Tightening Knob on top of the new ball-jointed clip.

  6. Andobil Easy Clip Car Mount Replacement: stap 6, afbeelding 1 van 1
    • Insert the new clipping mechanism into the back of the phone holder.

  7. Andobil Easy Clip Car Mount Replacement: stap 7, afbeelding 1 van 1
    • Open the Jaws using the knob on the top of the ball joint mechanism.

  8. Andobil Easy Clip Car Mount Replacement: stap 8, afbeelding 1 van 1
    • Line up the jaws with the car vent and then use the knob on the bottom to close the jaws.

  9. Andobil Easy Clip Car Mount Replacement: stap 9, afbeelding 1 van 1
    • Tighten the knob on the back of the phone holder once you have adjusted it to the correct angle.

  10. Andobil Easy Clip Car Mount Replacement: stap 10, afbeelding 1 van 1
    • Once you've finished tightening the knob, you are finished! This is the finished Product!

Conclusie

To reassemble your device, follow these instructions in reverse order.

Één andere persoon heeft deze handleiding voltooid.

Alexander Tavares

Lid sinds: 03/24/21

205 Reputatie

1 Handleiding geschreven

Team

0 opmerkingen

Voeg opmerking toe

Weergavestatistieken:

Afgelopen 24 uren: 1

Afgelopen 7 dagen: 7

Afgelopen 30 dagen: 44

Altijd: 1,543