Ga door naar hoofdinhoud

Amazon Fire HDX 8.9" 4th Gen. Motherboard Replacement

Wat je nodig hebt

  1. Amazon Fire HDX 8.9" 4th Gen. Motherboard Replacement, Screen: stap 1, afbeelding 1 van 3 Amazon Fire HDX 8.9" 4th Gen. Motherboard Replacement, Screen: stap 1, afbeelding 2 van 3 Amazon Fire HDX 8.9" 4th Gen. Motherboard Replacement, Screen: stap 1, afbeelding 3 van 3
    • Ensure that the device is turned off.

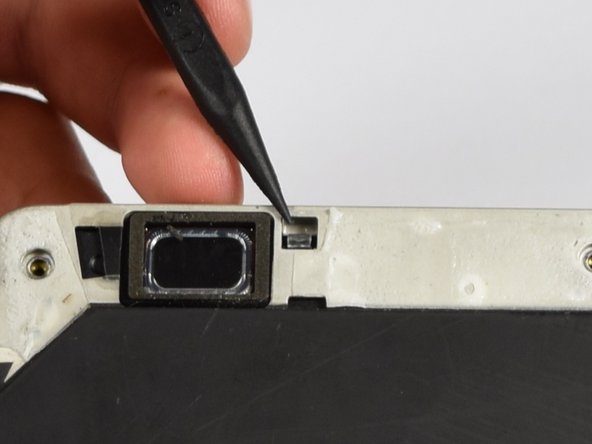
    • Holding the device firmly, wedge a plastic opening tool between the speaker cover and the device. Then pry up to separate it from the device.

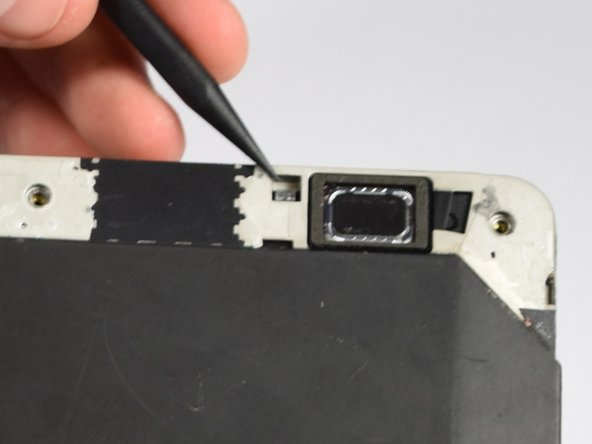
    • Then begin to firmly pry up the plastic cover with the plastic opening tool.

    • The backing is connected with adhesive so force may be necessary.

    • Be careful to not damage the plastic in any way.

    • Once you can fit your finger under the plastic cover, begin to slide your finger down the cover while simultaneously prying up.

  2. Amazon Fire HDX 8.9" 4th Gen. Motherboard Replacement: stap 2, afbeelding 1 van 2 Amazon Fire HDX 8.9" 4th Gen. Motherboard Replacement: stap 2, afbeelding 2 van 2
    • Once you reach the end of the plastic cover you should be able to completely remove it from the device.

  3. Amazon Fire HDX 8.9" 4th Gen. Motherboard Replacement: stap 3, afbeelding 1 van 2 Amazon Fire HDX 8.9" 4th Gen. Motherboard Replacement: stap 3, afbeelding 2 van 2
    • Use a T5 screwdriver to remove the four 3.5 mm T5 screws at the top of the device, where the black plastic trim was located.

  4. Amazon Fire HDX 8.9" 4th Gen. Motherboard Replacement: stap 4, afbeelding 1 van 3 Amazon Fire HDX 8.9" 4th Gen. Motherboard Replacement: stap 4, afbeelding 2 van 3 Amazon Fire HDX 8.9" 4th Gen. Motherboard Replacement: stap 4, afbeelding 3 van 3
    • Release the two clear plastic clips at the top of the device near the speaker using the spudger.

    • Simply push down the clip with the tip of the spudger.

    • Push lightly to ensure that the clips aren't damaged.

  5. Amazon Fire HDX 8.9" 4th Gen. Motherboard Replacement: stap 5, afbeelding 1 van 3 Amazon Fire HDX 8.9" 4th Gen. Motherboard Replacement: stap 5, afbeelding 2 van 3 Amazon Fire HDX 8.9" 4th Gen. Motherboard Replacement: stap 5, afbeelding 3 van 3
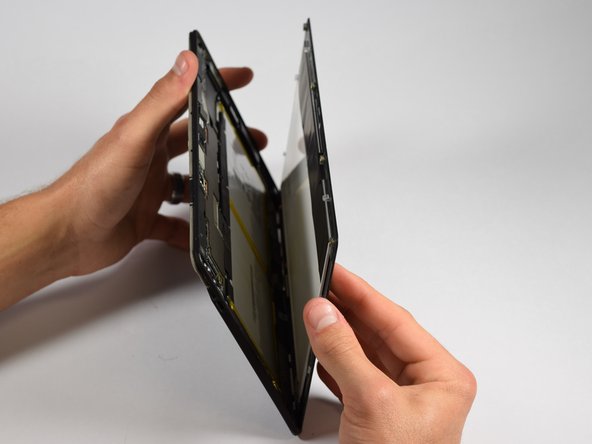
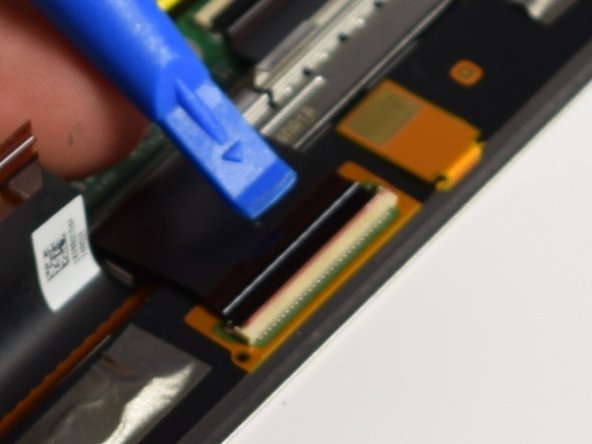
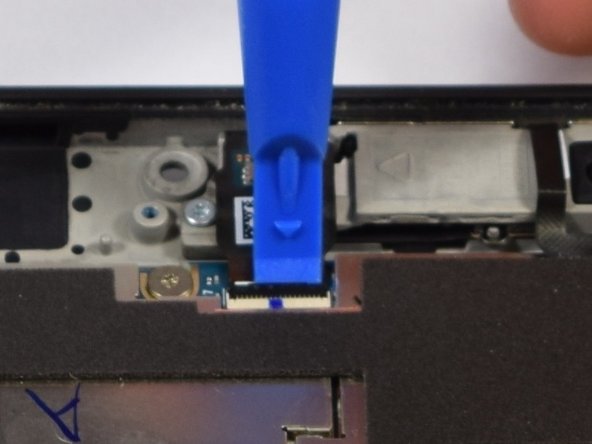
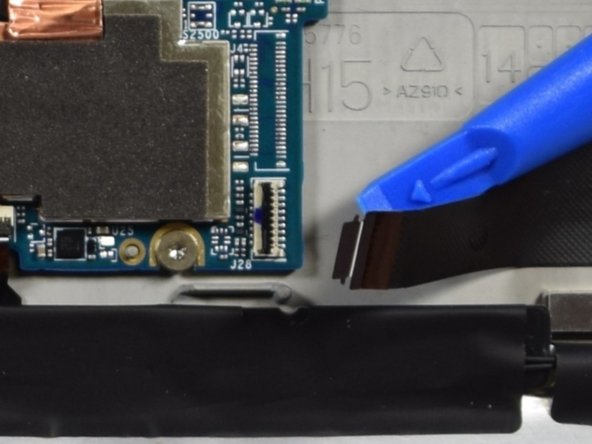
    • Use a plastic opening tool to wedge between the screen and the device, while simultaneously holding the clip open from step 4.

    • Pry the screen very gently to avoid cracking the glass

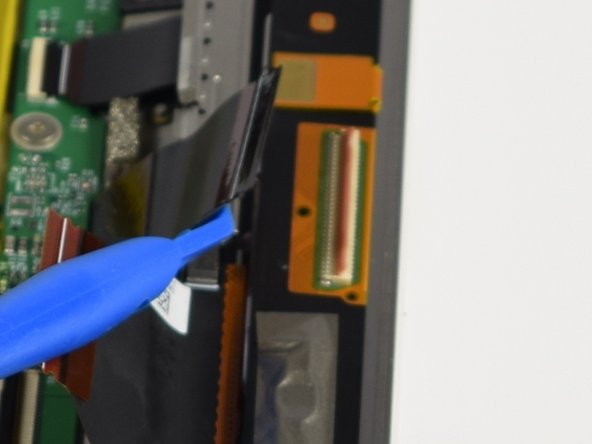
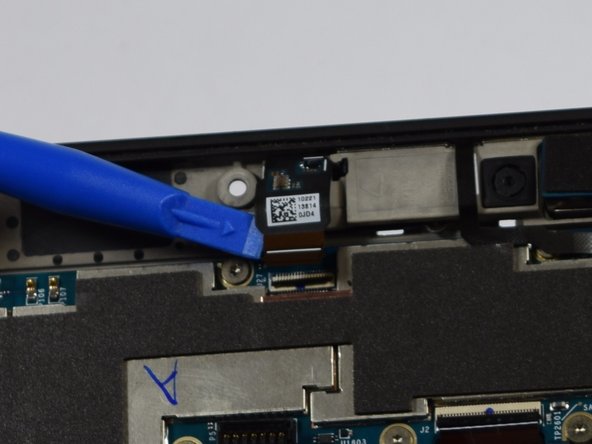
    • Start to remove the screen from where the black plastic trim was removed and work the tool around the sides of the device. You will here small pops from the clips on the sides being released.

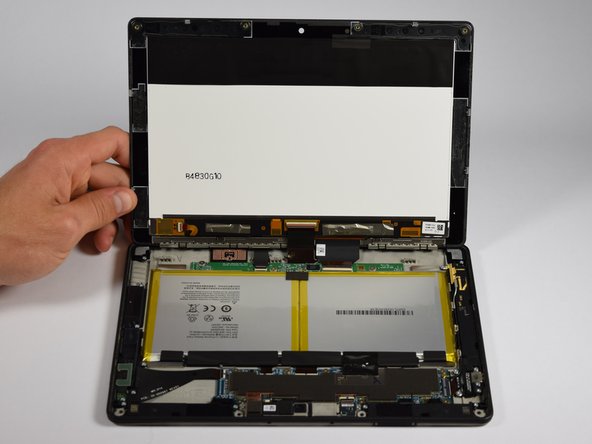
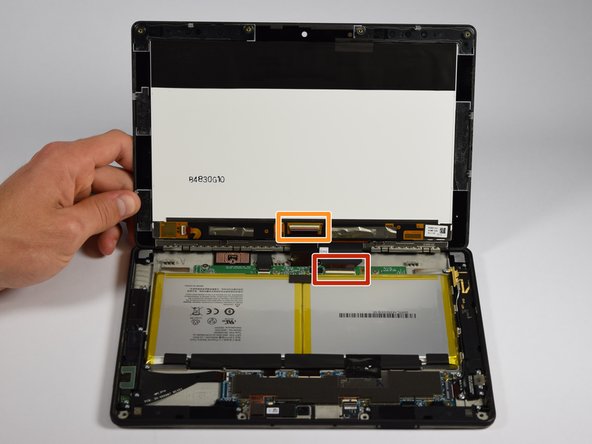
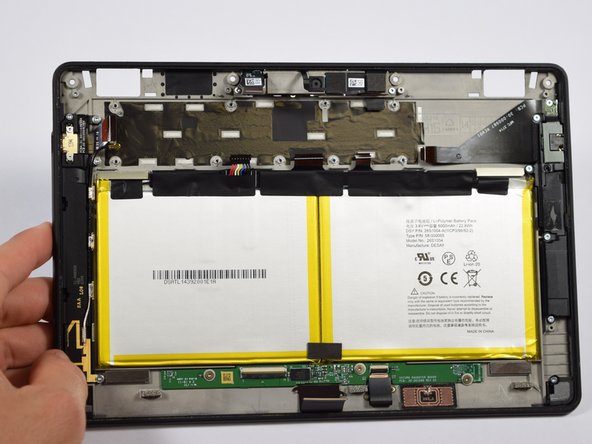
    • The Amazon Fire can now be opened with the two flex cables at the base still connected

  6. Amazon Fire HDX 8.9" 4th Gen. Motherboard Replacement: stap 6, afbeelding 1 van 2 Amazon Fire HDX 8.9" 4th Gen. Motherboard Replacement: stap 6, afbeelding 2 van 2
    • Now we have to remove the two flex cables attached to both the screen assembly and body of the device.

    • The cable addressed in step 8 is highlighted in orange.

  7. Amazon Fire HDX 8.9" 4th Gen. Motherboard Replacement: stap 7, afbeelding 1 van 3 Amazon Fire HDX 8.9" 4th Gen. Motherboard Replacement: stap 7, afbeelding 2 van 3 Amazon Fire HDX 8.9" 4th Gen. Motherboard Replacement: stap 7, afbeelding 3 van 3
    • First turn the device 90 degrees counterclockwise.

    • Wedge a spudger or plastic opening tool under the black flap of the larger connector and lift up.

    • Pull the belt out of the connector and lift it up.

  8. Amazon Fire HDX 8.9" 4th Gen. Motherboard Replacement: stap 8, afbeelding 1 van 3 Amazon Fire HDX 8.9" 4th Gen. Motherboard Replacement: stap 8, afbeelding 2 van 3 Amazon Fire HDX 8.9" 4th Gen. Motherboard Replacement: stap 8, afbeelding 3 van 3
    • Turn the device 180 degrees.

    • Repeat step 7 for the smaller flex cable connection.

  9. Amazon Fire HDX 8.9" 4th Gen. Motherboard Replacement: stap 9, afbeelding 1 van 1
    • Your screen assembly has now been removed and can be replaced.

  10. Amazon Fire HDX 8.9" 4th Gen. Motherboard Replacement, Motherboard: stap 10, afbeelding 1 van 2 Amazon Fire HDX 8.9" 4th Gen. Motherboard Replacement, Motherboard: stap 10, afbeelding 2 van 2
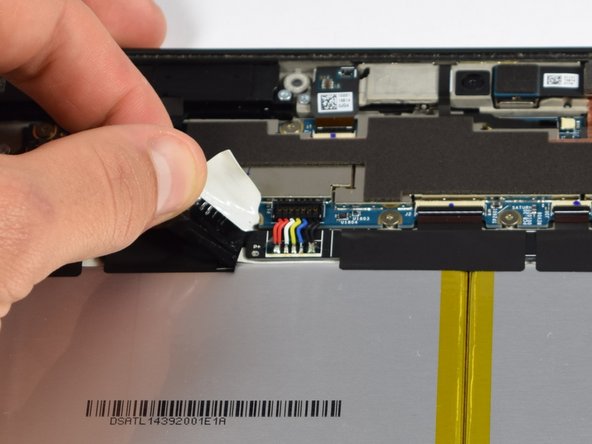
    • Orient the device by rotating the body 90 degrees clockwise.

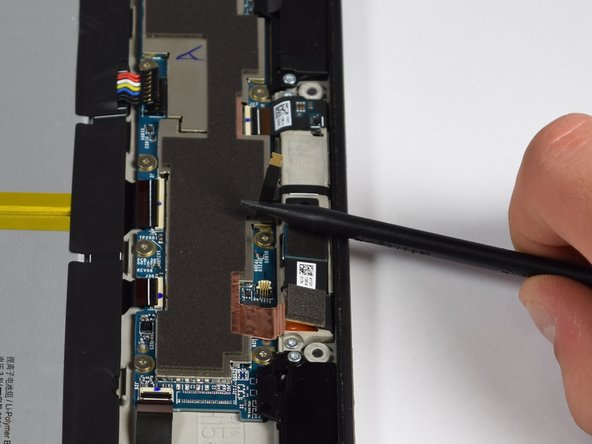
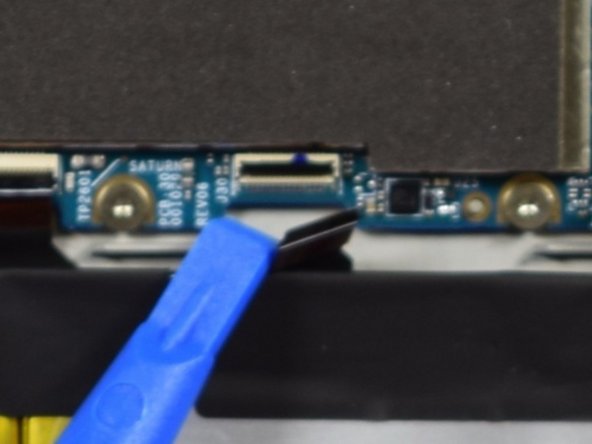
    • Peel off the black tape covering the main battery connection.

  11. Amazon Fire HDX 8.9" 4th Gen. Motherboard Replacement: stap 11, afbeelding 1 van 1
    • Use the spudger to lift up and release the battery connector.

  12. Amazon Fire HDX 8.9" 4th Gen. Motherboard Replacement: stap 12, afbeelding 1 van 1
    • Locate the circular gold plug to the left of the battery connection.

    • Use the spudger to lift this up from the motherboard.

  13. Amazon Fire HDX 8.9" 4th Gen. Motherboard Replacement: stap 13, afbeelding 1 van 2 Amazon Fire HDX 8.9" 4th Gen. Motherboard Replacement: stap 13, afbeelding 2 van 2
    • Now use the plastic opening tool to lift up the black flap directly above the gold plug.

    • Pull the flex cable out.

    • This is the procedure that will be followed for all flex cables indicated.

  14. Amazon Fire HDX 8.9" 4th Gen. Motherboard Replacement: stap 14, afbeelding 1 van 2 Amazon Fire HDX 8.9" 4th Gen. Motherboard Replacement: stap 14, afbeelding 2 van 2
    • Locate the third clip at the top center of the device, up from the first battery connector.

    • Follow the same procedure from the last step.

    • Lift up the black flap and pull out to release the flex cable.

  15. Amazon Fire HDX 8.9" 4th Gen. Motherboard Replacement: stap 15, afbeelding 1 van 3 Amazon Fire HDX 8.9" 4th Gen. Motherboard Replacement: stap 15, afbeelding 2 van 3 Amazon Fire HDX 8.9" 4th Gen. Motherboard Replacement: stap 15, afbeelding 3 van 3
    • Locate the white tab to the right and flip it up using the plastic opening tool.

    • Rotate the device 90 degrees clockwise.

    • Use the spudger to pull up the narrow black cable out and move it out of the way to the left.

  16. Amazon Fire HDX 8.9" 4th Gen. Motherboard Replacement: stap 16, afbeelding 1 van 2 Amazon Fire HDX 8.9" 4th Gen. Motherboard Replacement: stap 16, afbeelding 2 van 2
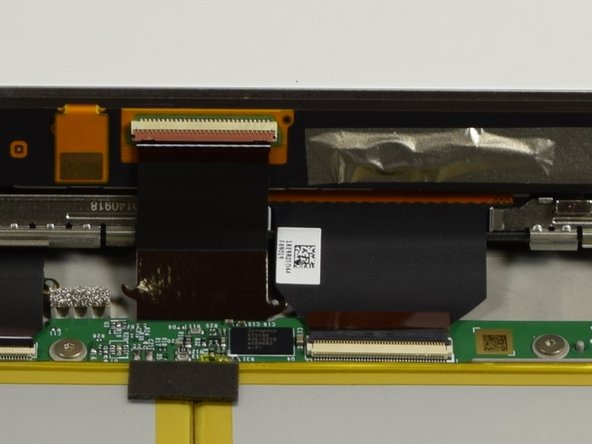
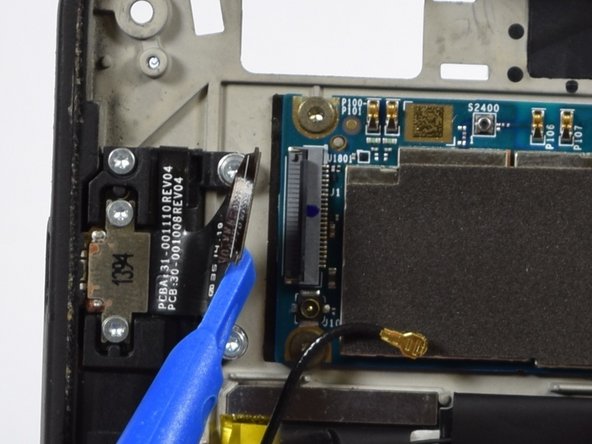
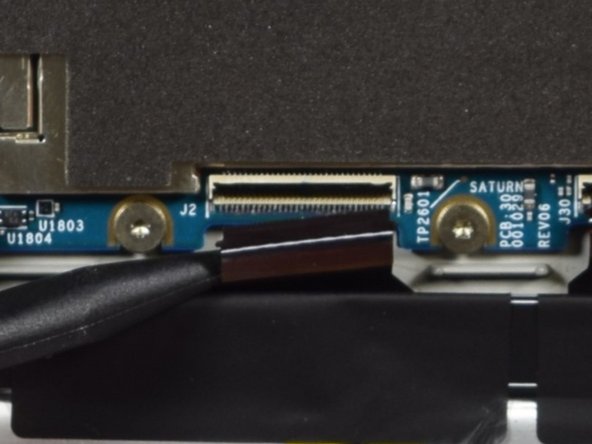
    • Now you will have to lift up the rear camera assembly that is covering the end of the copper strip.

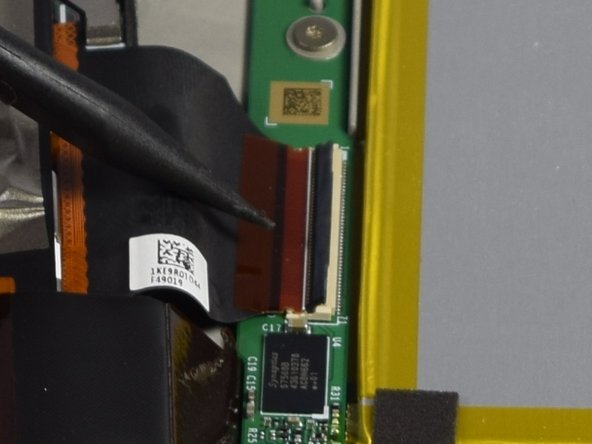
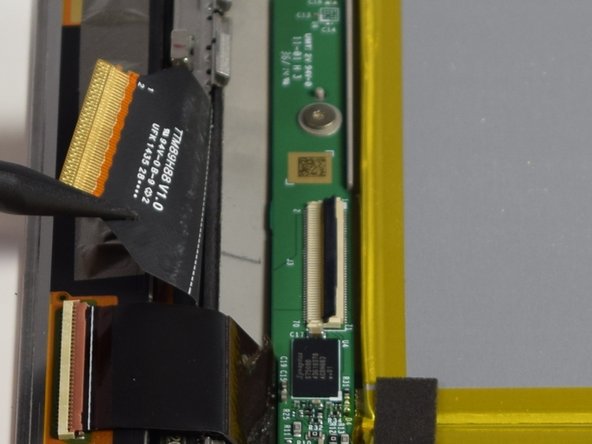
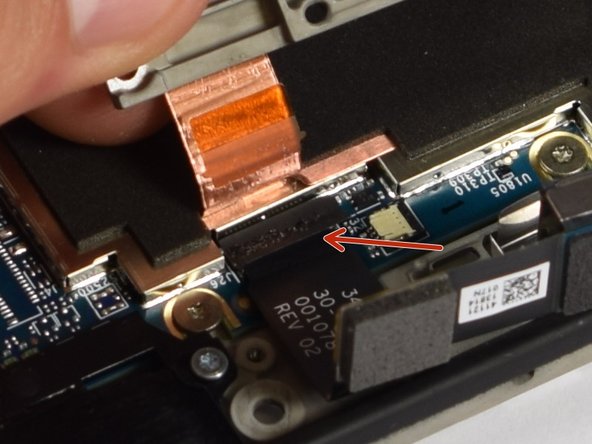
    • Once you see the sharp corner of the copper strip, use a spudger to lift it off of the camera housing. Under the strip will be another connector cover in a small piece of black tape. Follow the steps from step 5 to remove the cable from this connection.

  17. Amazon Fire HDX 8.9" 4th Gen. Motherboard Replacement: stap 17, afbeelding 1 van 2 Amazon Fire HDX 8.9" 4th Gen. Motherboard Replacement: stap 17, afbeelding 2 van 2
    • Use a plastic opening tool to disconnect the ZIF connector by flipping up the black retaining flap.

  18. Amazon Fire HDX 8.9" 4th Gen. Motherboard Replacement: stap 18, afbeelding 1 van 2 Amazon Fire HDX 8.9" 4th Gen. Motherboard Replacement: stap 18, afbeelding 2 van 2
    • Use a plastic opening tool to disconnect the ZIF connector by flipping up the black retaining flap.

  19. Amazon Fire HDX 8.9" 4th Gen. Motherboard Replacement: stap 19, afbeelding 1 van 2 Amazon Fire HDX 8.9" 4th Gen. Motherboard Replacement: stap 19, afbeelding 2 van 2
    • Use a plastic opening tool to disconnect the ZIF connector by flipping up the black retaining flap.

  20. Amazon Fire HDX 8.9" 4th Gen. Motherboard Replacement: stap 20, afbeelding 1 van 3 Amazon Fire HDX 8.9" 4th Gen. Motherboard Replacement: stap 20, afbeelding 2 van 3 Amazon Fire HDX 8.9" 4th Gen. Motherboard Replacement: stap 20, afbeelding 3 van 3
    • Using a T5 screwdriver remove the nine 1.5 mm T5 screws securing the mother board to the body.

    • When all screws are removed use a plastic opening tool to lift the mother board off the body.

    • The mother board has been completely removed.

Conclusie

To reassemble your device, follow these instructions in reverse order.

Één andere persoon heeft deze handleiding voltooid.

Sidney Stefani

Lid sinds: 04/11/16

463 Reputatie

4 handleidingen geschreven

Team

Cal Poly, Team 1-8, Maness Spring 2016 Lid van Cal Poly, Team 1-8, Maness Spring 2016

CPSU-MANESS-S16S1G8

5 Leden

6 handleidingen geschreven

0 opmerkingen

Voeg opmerking toe

Weergavestatistieken:

Afgelopen 24 uren: 0

Afgelopen 7 dagen: 0

Afgelopen 30 dagen: 2

Altijd: 1,154