Inleiding
The Kindle Fire HD 7 (4th Generation) uses a 3.7V, Li-ion battery. This guide will help you locate and replace the battery.
Wat je nodig hebt
-
-
Insert the plastic opening tool behind the rear case to free the clips holding the case together.
-
Work your way around the device to free all the clips.
-
-
-
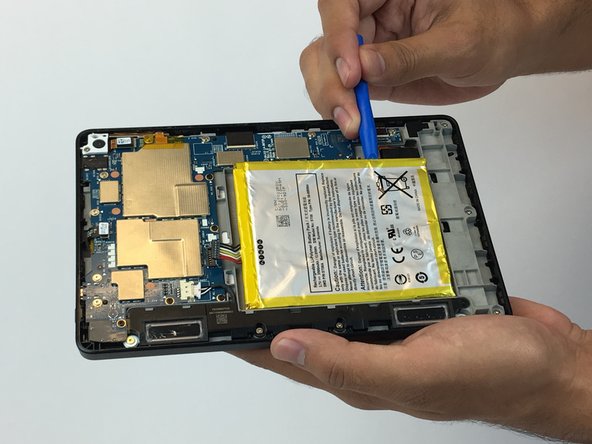
There are an additional 9 clips in the center of the case, surrounding the battery. Insert the plastic tool into the clips and lift to disconnect them.
-
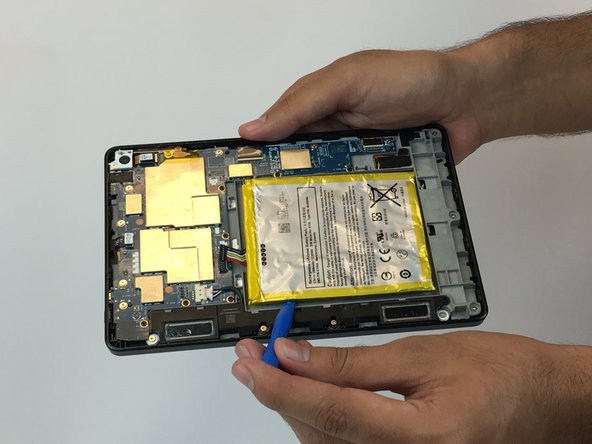
Once all clips have been released, the back case can be pulled free to reveal the inside of the device.
Make sure you're very careful when you are prying up around the speakers, you could damage them! Take your time, and don't get in too much of a hurry taking the back off.
-
-


To reassemble your device, follow these instructions in reverse order.
To reassemble your device, follow these instructions in reverse order.
Annuleren: ik heb deze handleiding niet afgemaakt.
13 andere personen hebben deze handleiding voltooid.
Team

USF Tampa, Team 4-4, Passmore Fall 2016 Lid van USF Tampa, Team 4-4, Passmore Fall 2016
USFT-PASSMORE-F16S4G4
4 Leden
10 handleidingen geschreven
4 opmerkingen
Which direction are you placing the prying tool to release the clips; to open it up? With the prying tip facing up to release clips and then use to lift the back up as you move along the edges or face prying tip down to release clips which will then release the back to lift?
Also, using a black case, it’s hard to tell in the pic where exactly these clips are? Can you mark them on a photo?
Thank you! What seems to be an easy task is proving to be a struggle for my 4th Gen 7HD.
I have just replaced the battery in my wife's Kindle and the clips did not want to let go. I had to warn the back of the case with a hair dryer to get it to flex. The battery was well stuck down and needed a metal pry tool to release it.
Thanks for the information, but is there any risk of electric shock?