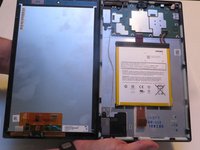
Ga door naar hoofdinhoud

Amazon Fire HD 10 Rear Facing Camera Replacement

Wat je nodig hebt

  1. Amazon Fire HD 10 Rear Facing Camera Replacement, Screen: stap 1, afbeelding 1 van 3 Amazon Fire HD 10 Rear Facing Camera Replacement, Screen: stap 1, afbeelding 2 van 3 Amazon Fire HD 10 Rear Facing Camera Replacement, Screen: stap 1, afbeelding 3 van 3
    • Avoid prying near bottom right hand side due to LCD Connector

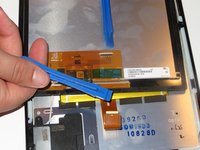
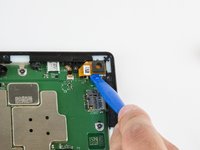
    • Use a plastic opening tool to pry the screen up in the right hand corner.

  2. Amazon Fire HD 10 Rear Facing Camera Replacement: stap 2, afbeelding 1 van 1
    • Do not completely remove the screen yet as there is a ZIF connector connected.

    • Lift the screen and digitizer from the case.

    • You may need to use some force due to the glue.

  3. Amazon Fire HD 10 Rear Facing Camera Replacement: stap 3, afbeelding 1 van 2 Amazon Fire HD 10 Rear Facing Camera Replacement: stap 3, afbeelding 2 van 2
    • Be mindful of the ZIF connector.

    • Disconnect the ribbon connector from the digitizer side using your hands or the plastic opening tool.

  4. Amazon Fire HD 10 Rear Facing Camera Replacement: stap 4, afbeelding 1 van 1
    • Remove the screen and digitizer from the case completely.

  5. Amazon Fire HD 10 Rear Facing Camera Replacement, Rear Facing Camera: stap 5, afbeelding 1 van 2 Amazon Fire HD 10 Rear Facing Camera Replacement, Rear Facing Camera: stap 5, afbeelding 2 van 2
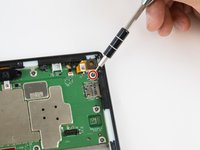
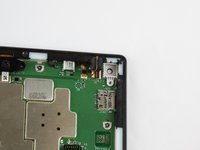
    • Remove the single T5 Torx screw at the base of the camera.

    • Once removed, place the screw aside in a safe location.

  6. Amazon Fire HD 10 Rear Facing Camera Replacement: stap 6, afbeelding 1 van 2 Amazon Fire HD 10 Rear Facing Camera Replacement: stap 6, afbeelding 2 van 2
    • Lift the camera from the case using the plastic opening tool.

    • The camera is still connected to the motherboard via the ZIF connector.

  7. Amazon Fire HD 10 Rear Facing Camera Replacement: stap 7, afbeelding 1 van 2 Amazon Fire HD 10 Rear Facing Camera Replacement: stap 7, afbeelding 2 van 2
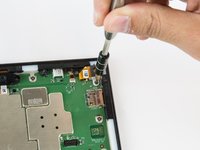
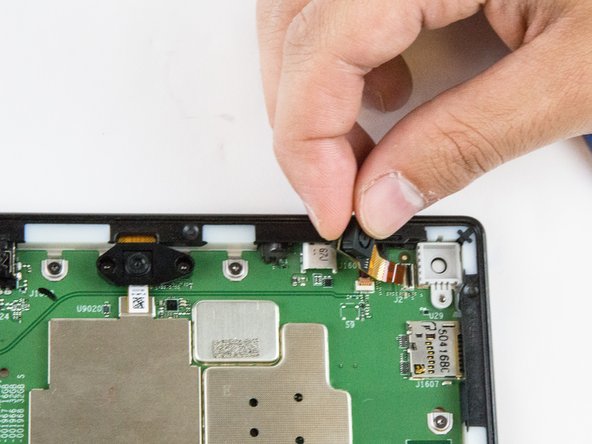
    • Gently grab the camera and pull to remove.

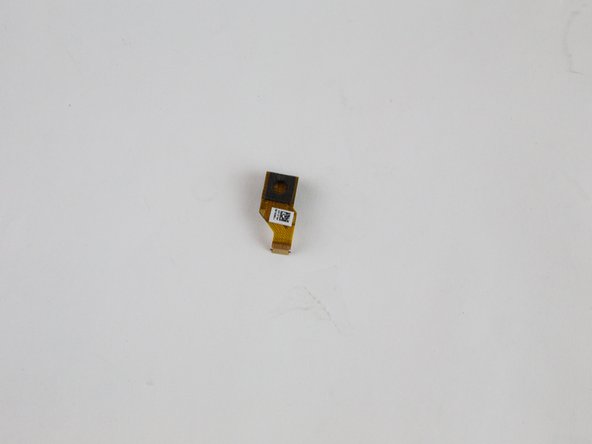
    • The camera is now free from the motherboard.

Conclusie

To reassemble your device, follow these instructions in reverse order.

2 andere personen hebben deze handleiding voltooid.

Jaie Hillery

Lid sinds: 10/07/14

1.718 Reputatie

10 handleidingen geschreven

Team

USF Tampa, Team 16-6, Blackwell Winter 2016 Lid van USF Tampa, Team 16-6, Blackwell Winter 2016

USFT-BLACKWELL-W16S16G6

3 Leden

22 handleidingen geschreven

0 opmerkingen

Voeg opmerking toe

Weergavestatistieken:

Afgelopen 24 uren: 0

Afgelopen 7 dagen: 0

Afgelopen 30 dagen: 1

Altijd: 864