Ga door naar hoofdinhoud

Amazon Echo Show 5 Camera Replacement

Wat je nodig hebt

  1. Amazon Echo Show 5 Camera Replacement, Amazon Echo Show 5 Disassembly: stap 1, afbeelding 1 van 3 Amazon Echo Show 5 Camera Replacement, Amazon Echo Show 5 Disassembly: stap 1, afbeelding 2 van 3 Amazon Echo Show 5 Camera Replacement, Amazon Echo Show 5 Disassembly: stap 1, afbeelding 3 van 3
    • Power off and unplug the Amazon Echo Show 5. Failure to do so could result in injury or damage to the device.

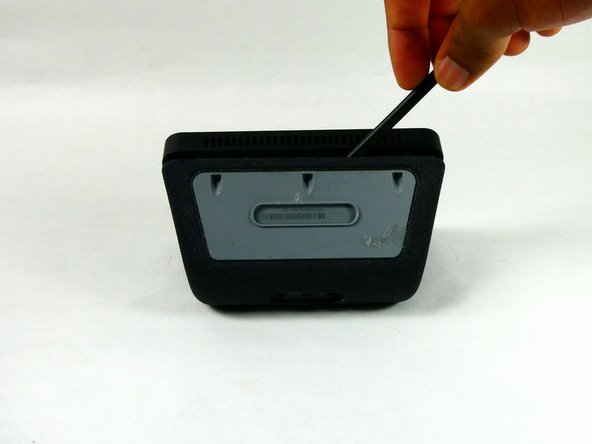
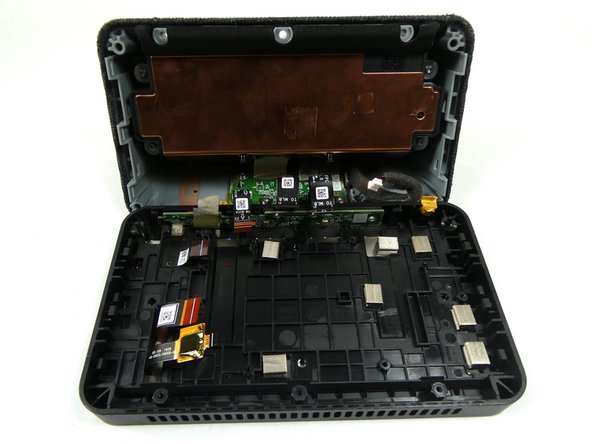
    • Orient the Amazon Echo Show 5 so that the display is face down.

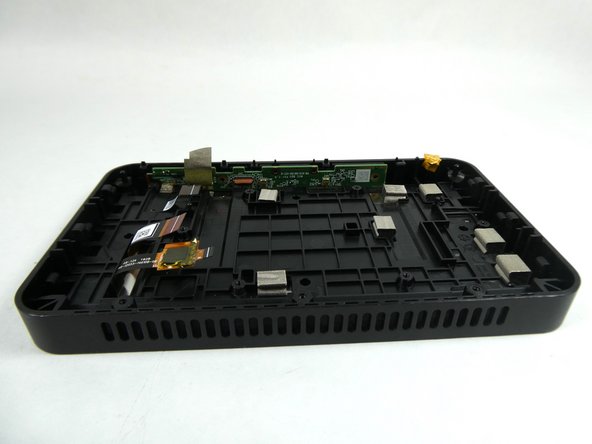
    • Use a spudger to remove the grey bottom cover.

    • During reassembly, adhesive needs to be applied to secure the bottom cover.

  2. Amazon Echo Show 5 Camera Replacement: stap 2, afbeelding 1 van 2 Amazon Echo Show 5 Camera Replacement: stap 2, afbeelding 2 van 2
    • Remove the three screws with a T6 Torx screwdriver.

  3. Amazon Echo Show 5 Camera Replacement: stap 3, afbeelding 1 van 3 Amazon Echo Show 5 Camera Replacement: stap 3, afbeelding 2 van 3 Amazon Echo Show 5 Camera Replacement: stap 3, afbeelding 3 van 3
    • Use a spudger to release the six internal tabs lining the sides of the device.

    • There are fragile ribbon connectors along the side of the screen with the camera on it. So, do not stick the spudger more than a couple millimeters into the device.

  4. Amazon Echo Show 5 Camera Replacement: stap 4, afbeelding 1 van 1
    • Carefully open the device by folding it open along the top edge where the camera is located.

    • Do not try to open the device from any other side as this would damage the ribbon connectors.

  5. Amazon Echo Show 5 Camera Replacement, Motherboard: stap 5, afbeelding 1 van 1
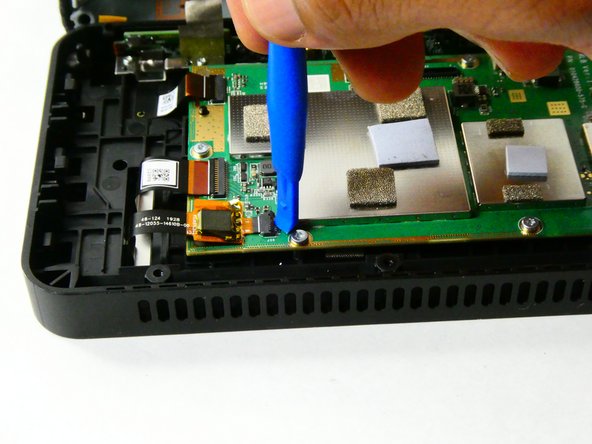
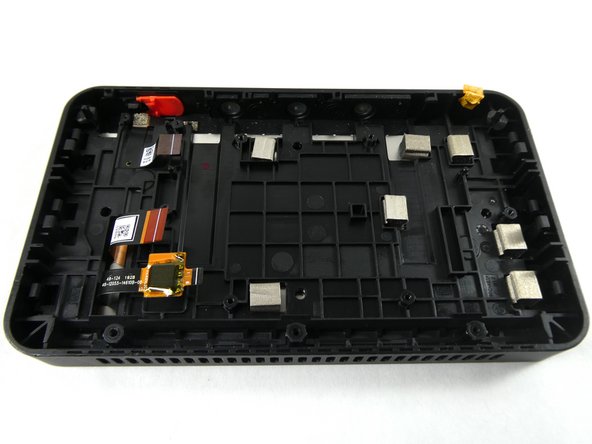
    • Remove the red and black power connector connecting to the motherboard with either a prying tool or your hands.

  6. Amazon Echo Show 5 Camera Replacement: stap 6, afbeelding 1 van 2 Amazon Echo Show 5 Camera Replacement: stap 6, afbeelding 2 van 2
    • Disconnect the five ribbon cables connecting to the motherboard.

    • To disconnect the cables, use the tip of a prying tool, or your fingernail, to flip up the small locking flap. Then, you can safely pull the cable out.

    • Be sure to pry up the hinged flap, not the connector socket.

    • There is a white line on the ribbon connectors that indicates the edge of the connection area. To reinstall, insert the connector up to this white line and close the flap. If the white line is clearly visible after closing the flap, it is probably misaligned and needs to be repositioned.

  7. Amazon Echo Show 5 Camera Replacement: stap 7, afbeelding 1 van 1
    • Remove the six 4 mm screws that are used to hold down the motherboard using a T6 Security Torx Screwdriver.

  8. Amazon Echo Show 5 Camera Replacement: stap 8, afbeelding 1 van 2 Amazon Echo Show 5 Camera Replacement: stap 8, afbeelding 2 van 2
    • Lift the motherboard up and out.

  9. Amazon Echo Show 5 Camera Replacement, Microphone: stap 9, afbeelding 1 van 3 Amazon Echo Show 5 Camera Replacement, Microphone: stap 9, afbeelding 2 van 3 Amazon Echo Show 5 Camera Replacement, Microphone: stap 9, afbeelding 3 van 3
    Gereedschap gebruikt in deze stap:
    Tweezers
    $4.99
    Koop
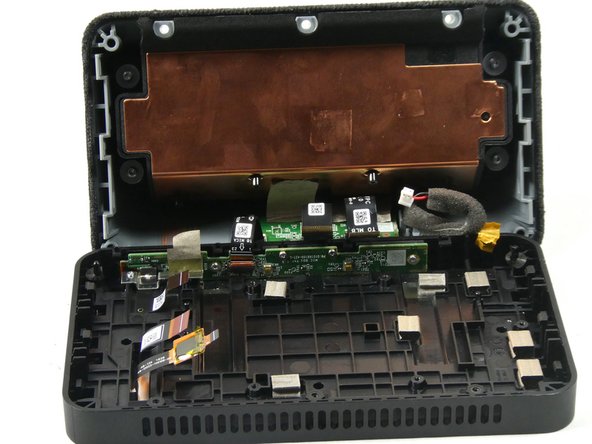
    • Use the Philips #000 Screwdriver to remove two 4mm screws that hold down the metal bracket.

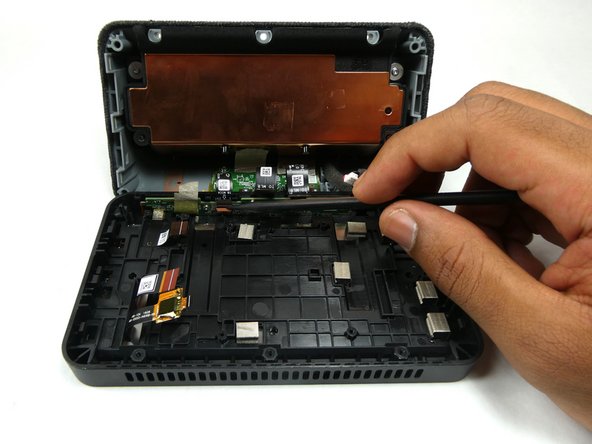
    • Use tweezers to remove the metal bracket by lifting it up and towards yourself.

  10. Amazon Echo Show 5 Camera Replacement: stap 10, afbeelding 1 van 3 Amazon Echo Show 5 Camera Replacement: stap 10, afbeelding 2 van 3 Amazon Echo Show 5 Camera Replacement: stap 10, afbeelding 3 van 3
    • Use a spudger or your fingernail to remove the ribbon connector which connects the speaker housing board to the microphone board.

    • Ribbon connectors are very fragile, do not bend kink or bend them excessively. This will result in damage to the device.

    • There is a white line on the ribbon connector. During reassembly ensure that the white connector is inserted up to the white line and that the white line is not misaligned with the ribbon connector.

  11. Amazon Echo Show 5 Camera Replacement: stap 11, afbeelding 1 van 3 Amazon Echo Show 5 Camera Replacement: stap 11, afbeelding 2 van 3 Amazon Echo Show 5 Camera Replacement: stap 11, afbeelding 3 van 3
    • Use the Philips #000 Screwdriver to remove the four 4 mm screws that attach the microphone board to the case.

  12. Amazon Echo Show 5 Camera Replacement: stap 12, afbeelding 1 van 2 Amazon Echo Show 5 Camera Replacement: stap 12, afbeelding 2 van 2
    • Use a tweezer to remove the microphone board from the case.

  13. Amazon Echo Show 5 Camera Replacement, Camera: stap 13, afbeelding 1 van 2 Amazon Echo Show 5 Camera Replacement, Camera: stap 13, afbeelding 2 van 2
    Gereedschap gebruikt in deze stap:
    Tweezers
    $4.99
    Koop
    • Use tweezers to remove the camera from the display assembly.

    • The camera has adhesive on the ribbon connector which needs to be reapplied in order to reassemble it.

    • The ribbon connector attached to the camera is very fragile. Avoid bending or kinking the connector as this will cause damage to the device.

Conclusie

To reassemble your device, follow these instructions in reverse order.

Nicholas Sardinha

Lid sinds: 10/26/22

211 Reputatie

2 handleidingen geschreven

Team

UMass Dartmouth, Team 2-4, Petersen Fall 2022 Lid van UMass Dartmouth, Team 2-4, Petersen Fall 2022

UMASSD-PETERSEN-F22S2G4

3 Leden

7 handleidingen geschreven

0 opmerkingen

Voeg opmerking toe

Weergavestatistieken:

Afgelopen 24 uren: 1

Afgelopen 7 dagen: 5

Afgelopen 30 dagen: 17

Altijd: 254