Ga door naar hoofdinhoud

Amazon Echo Show 10 3rd Gen Power Jack Replacement

Wat je nodig hebt

  1. Amazon Echo Show 10 3rd Gen Power Jack Replacement, Power Jack: stap 1, afbeelding 1 van 2 Amazon Echo Show 10 3rd Gen Power Jack Replacement, Power Jack: stap 1, afbeelding 2 van 2
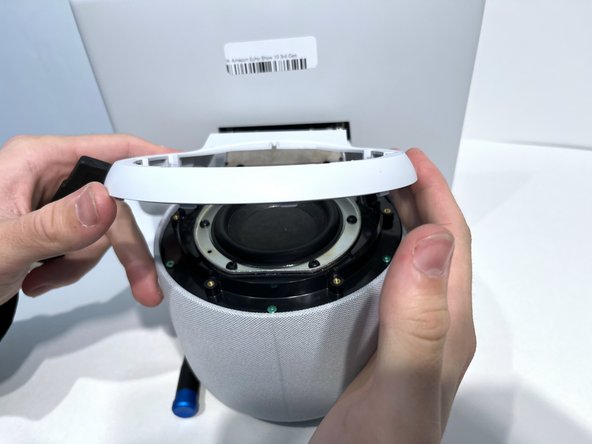
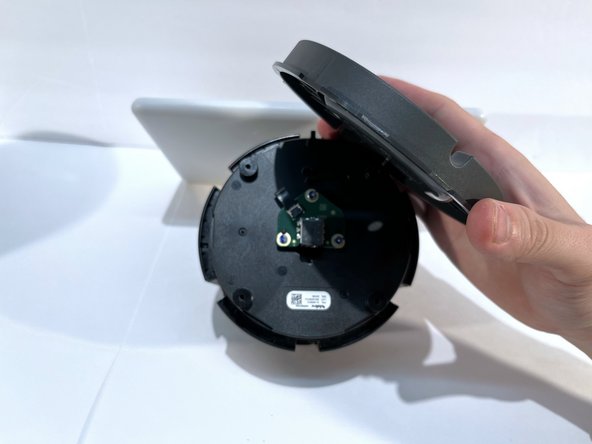
    • With the echo device standing upright, firmly grip the base and use the blue opening tool to gently pry the lid from the mesh speaker base.

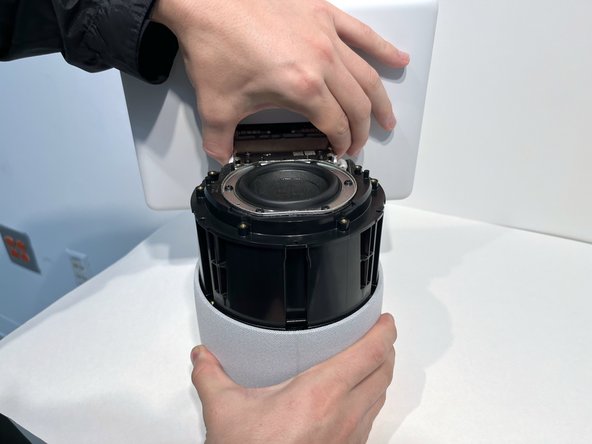
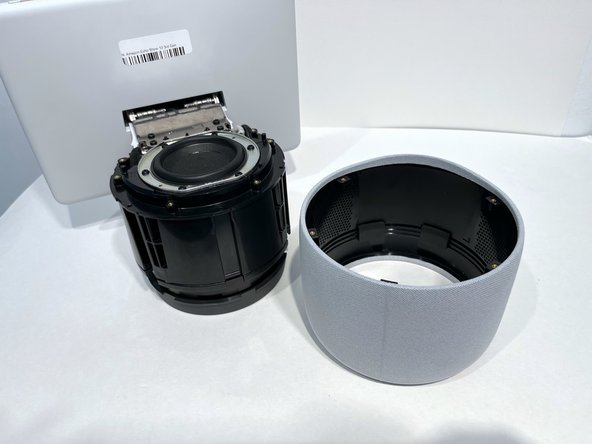
    • Remove the lid and set it aside.

  2. Amazon Echo Show 10 3rd Gen Power Jack Replacement: stap 2, afbeelding 1 van 1
    • Use a TR8 Torx Security to remove the six 9 mm screws from the perimeter of the plastic bezel on the top edge of the device.

  3. Amazon Echo Show 10 3rd Gen Power Jack Replacement: stap 3, afbeelding 1 van 2 Amazon Echo Show 10 3rd Gen Power Jack Replacement: stap 3, afbeelding 2 van 2
    • Release the adhesive seal connecting the bezel to the main base by inserting a Jimmy underneath the edge, and gently sliding from one side to another.

    • Lift up the outermost edge of the plastic bezel (furthest from the display) to remove it and set it aside.

    • After removing the screws in the previous step, the only thing holding this component in place is glue. You may need to apply a little force to break the seal created by any remaining glue to remove the bezel component. You could also apply a little heat with the iOpener to loosen the adhesive.

  4. Amazon Echo Show 10 3rd Gen Power Jack Replacement: stap 4, afbeelding 1 van 1
    • Use a Torx T6 screwdriver to remove the five 10 mm screws from the perimeter of the top surface of the base.

  5. Amazon Echo Show 10 3rd Gen Power Jack Replacement: stap 5, afbeelding 1 van 2 Amazon Echo Show 10 3rd Gen Power Jack Replacement: stap 5, afbeelding 2 van 2
    • With one hand securely holding the neck of the display and the other holding the device base, gently lift the device out of the mesh shell.

    • Place the shell aside.

  6. Amazon Echo Show 10 3rd Gen Power Jack Replacement: stap 6, afbeelding 1 van 2 Amazon Echo Show 10 3rd Gen Power Jack Replacement: stap 6, afbeelding 2 van 2
    • Turn the device on its side with the bottom facing upwards and out.

    • Use a blue opening tool along the edge of the base to pry off the adhesive strip.

    • Gently pull off the strip and place it aside.

    • A little force is necessary to separate the rubber strip from the feet of the device.

  7. Amazon Echo Show 10 3rd Gen Power Jack Replacement: stap 7, afbeelding 1 van 2 Amazon Echo Show 10 3rd Gen Power Jack Replacement: stap 7, afbeelding 2 van 2
    • Use a Torx T10 screwdriver to remove the four 9 mm screws from the perimeter of the bottom surface of the device.

    • Remove the plastic base cover and set it aside.

  8. Amazon Echo Show 10 3rd Gen Power Jack Replacement: stap 8, afbeelding 1 van 2 Amazon Echo Show 10 3rd Gen Power Jack Replacement: stap 8, afbeelding 2 van 2
    • Use a nylon spudger to flip up the small locking flap on the ribbon cable connector and gently pull the cable out.

  9. Amazon Echo Show 10 3rd Gen Power Jack Replacement: stap 9, afbeelding 1 van 1
    • Use a Torx T6 screwdriver to remove the three 9 mm screws from the power board.

  10. Amazon Echo Show 10 3rd Gen Power Jack Replacement: stap 10, afbeelding 1 van 1
    • Lift the power board from the base.

Conclusie

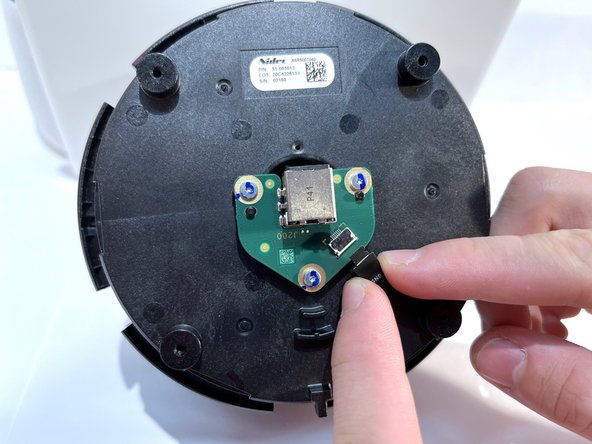
To reassemble your device, follow these instructions in reverse order.

Macy Ormand

Lid sinds: 09/13/23

1.073 Reputatie

6 handleidingen geschreven

0 opmerkingen

Voeg opmerking toe

Weergavestatistieken:

Afgelopen 24 uren: 0

Afgelopen 7 dagen: 2

Afgelopen 30 dagen: 6

Altijd: 72