Ga door naar hoofdinhoud

Alienware 17 R2 Hard Drive Replacement

Wat je nodig hebt

  1. Alienware 17 R2 Hard Drive Replacement, Hard Drive: stap 1, afbeelding 1 van 1
    • Make sure the laptop is unplugged from any power source.

    • Put the laptop facing down on a hard surface.

  2. Alienware 17 R2 Hard Drive Replacement: stap 2, afbeelding 1 van 3 Alienware 17 R2 Hard Drive Replacement: stap 2, afbeelding 2 van 3 Alienware 17 R2 Hard Drive Replacement: stap 2, afbeelding 3 van 3
    • Unscrew the two 6mm screws on the bottom side of the laptop.

    • Lift up the back cover and slide towards you.

  3. Alienware 17 R2 Hard Drive Replacement: stap 3, afbeelding 1 van 2 Alienware 17 R2 Hard Drive Replacement: stap 3, afbeelding 2 van 2
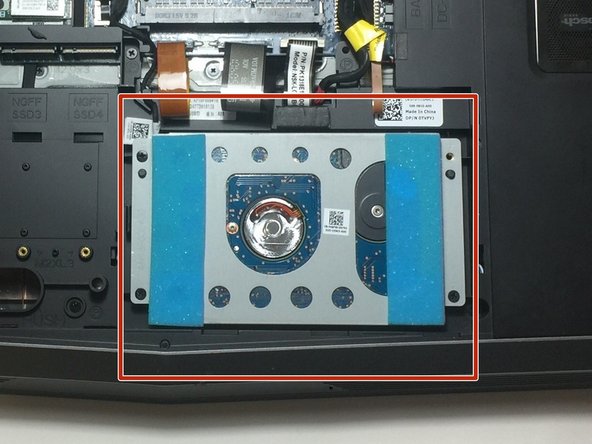
    • Locate the Hard Drive

  4. Alienware 17 R2 Hard Drive Replacement: stap 4, afbeelding 1 van 1
    • Remove the screws that connect the SSD Bay to the laptop

  5. Alienware 17 R2 Hard Drive Replacement: stap 5, afbeelding 1 van 1
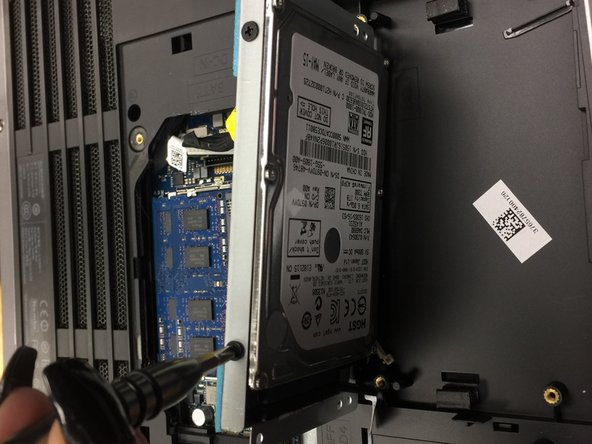
    • Unscrew the three screws holding the hard drive

  6. Alienware 17 R2 Hard Drive Replacement: stap 6, afbeelding 1 van 2 Alienware 17 R2 Hard Drive Replacement: stap 6, afbeelding 2 van 2
    • Unscrew the four screws on the long sides of the hard drive casing

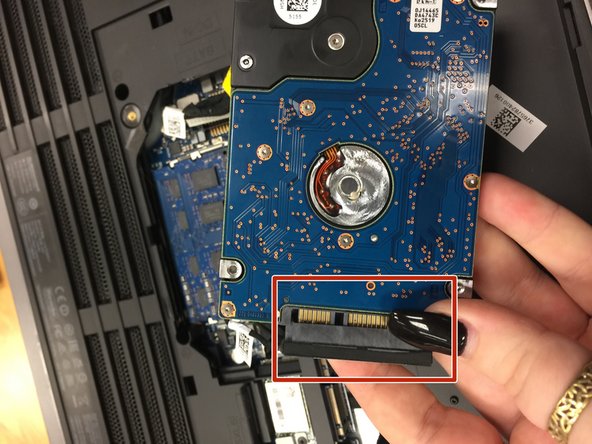
  7. Alienware 17 R2 Hard Drive Replacement: stap 7, afbeelding 1 van 3 Alienware 17 R2 Hard Drive Replacement: stap 7, afbeelding 2 van 3 Alienware 17 R2 Hard Drive Replacement: stap 7, afbeelding 3 van 3
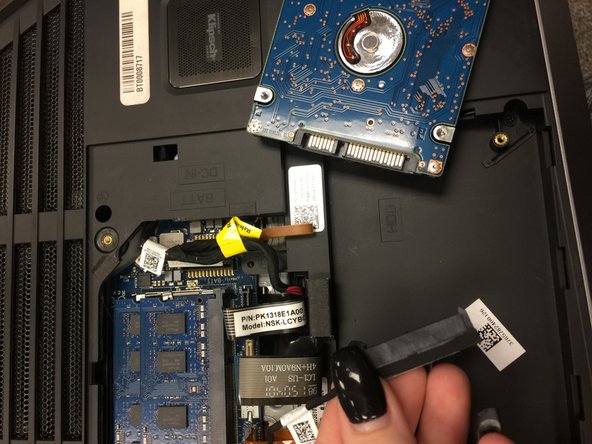
    • Now that the hard drive casing is off, carefully unplug the hard drive from the laptop

    • Your hard drive has now been successfully removed from your device

Conclusie

To reassemble your device, follow these instructions in reverse order.

Luis Garcia

Lid sinds: 09/20/17

402 Reputatie

4 handleidingen geschreven

0 opmerkingen

Voeg opmerking toe

Weergavestatistieken:

Afgelopen 24 uren: 2

Afgelopen 7 dagen: 8

Afgelopen 30 dagen: 21

Altijd: 1,491