Ga door naar hoofdinhoud

Acer Nitro 5 AN515-55-56GN HDD Replacement

Wat je nodig hebt

  1. Acer Nitro 5 AN515-55-56GN HDD Replacement, HDD: stap 1, afbeelding 1 van 3 Acer Nitro 5 AN515-55-56GN HDD Replacement, HDD: stap 1, afbeelding 2 van 3 Acer Nitro 5 AN515-55-56GN HDD Replacement, HDD: stap 1, afbeelding 3 van 3
    • Turn off the laptop and unplug it from the charging cord.

    • Flip the laptop over so the backside is facing up.

    • Use a Phillips #0 screwdriver to remove ten 9 mm screws.

  2. Acer Nitro 5 AN515-55-56GN HDD Replacement: stap 2, afbeelding 1 van 3 Acer Nitro 5 AN515-55-56GN HDD Replacement: stap 2, afbeelding 2 van 3 Acer Nitro 5 AN515-55-56GN HDD Replacement: stap 2, afbeelding 3 van 3
    • Use your fingers or an opening tool to remove the back case by separating it at the seam.

    • Work your way gently around the perimeter to undo the clips.

    • Remove the back case.

  3. Acer Nitro 5 AN515-55-56GN HDD Replacement: stap 3, afbeelding 1 van 3 Acer Nitro 5 AN515-55-56GN HDD Replacement: stap 3, afbeelding 2 van 3 Acer Nitro 5 AN515-55-56GN HDD Replacement: stap 3, afbeelding 3 van 3
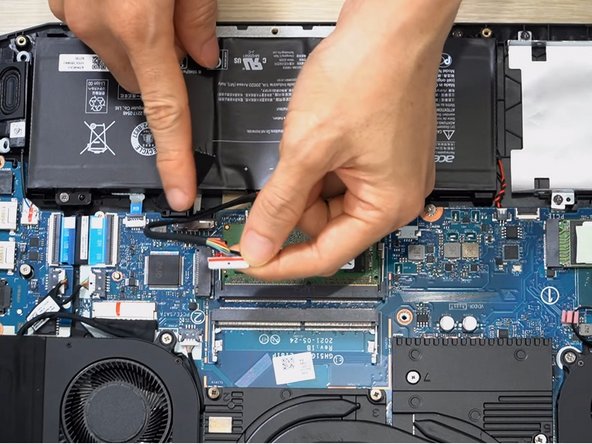
    • Unplug the battery cable from the connector attaching the battery to the motherboard.

    • Make sure that the laptop battery is unplugged or remove the battery before installing the HDD.

  4. Acer Nitro 5 AN515-55-56GN HDD Replacement: stap 4, afbeelding 1 van 3 Acer Nitro 5 AN515-55-56GN HDD Replacement: stap 4, afbeelding 2 van 3 Acer Nitro 5 AN515-55-56GN HDD Replacement: stap 4, afbeelding 3 van 3
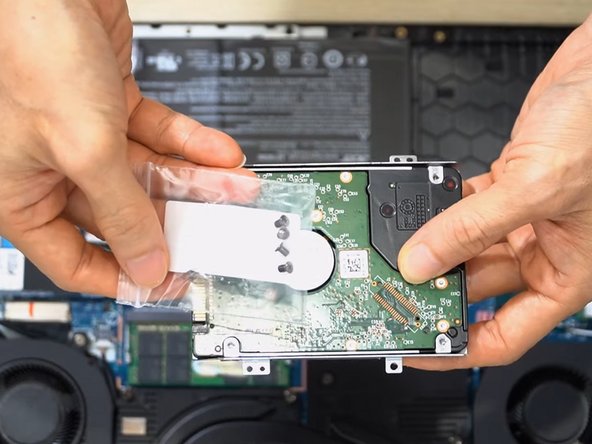
    • Use the Phillips #0 screwdriver to remove four 3 mm screws from the hard drive bracket.

    • Remove the bracket from the device.

  5. Acer Nitro 5 AN515-55-56GN HDD Replacement: stap 5, afbeelding 1 van 3 Acer Nitro 5 AN515-55-56GN HDD Replacement: stap 5, afbeelding 2 van 3 Acer Nitro 5 AN515-55-56GN HDD Replacement: stap 5, afbeelding 3 van 3
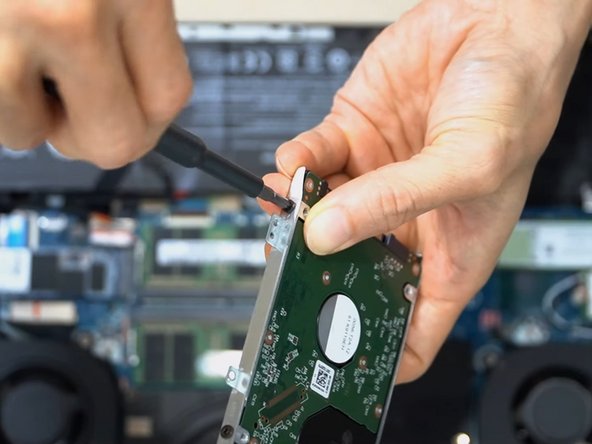
    • Place the HDD 1TB in the bracket.

    • Use the Phillips #0 screwdriver to secure the 2 mm screws that hold the HDD in the bracket.

    • The 2 mm screws are included with the new HDD.

  6. Acer Nitro 5 AN515-55-56GN HDD Replacement: stap 6, afbeelding 1 van 2 Acer Nitro 5 AN515-55-56GN HDD Replacement: stap 6, afbeelding 2 van 2
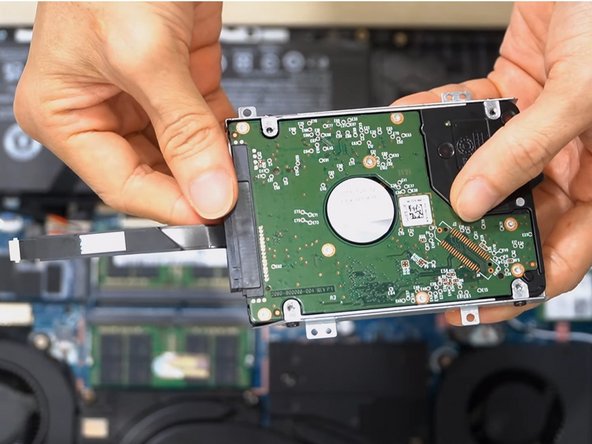
    • Attach the SATA connector to the HDD.

  7. Acer Nitro 5 AN515-55-56GN HDD Replacement: stap 7, afbeelding 1 van 2 Acer Nitro 5 AN515-55-56GN HDD Replacement: stap 7, afbeelding 2 van 2
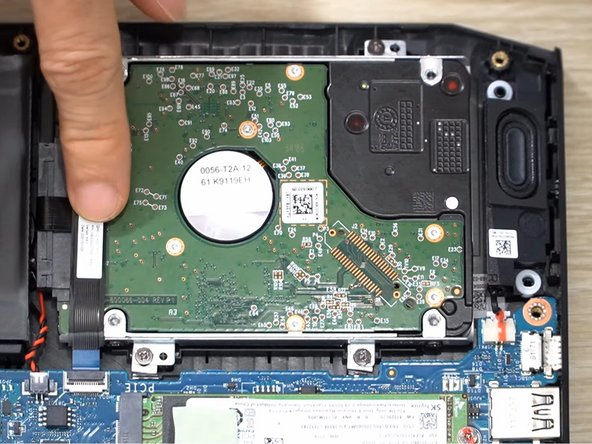
    • Slide the HDD into the socket on the motherboard.

    • Replace the four 3 mm screws using the Phillips #0 screwdriver.

  8. Acer Nitro 5 AN515-55-56GN HDD Replacement: stap 8, afbeelding 1 van 3 Acer Nitro 5 AN515-55-56GN HDD Replacement: stap 8, afbeelding 2 van 3 Acer Nitro 5 AN515-55-56GN HDD Replacement: stap 8, afbeelding 3 van 3
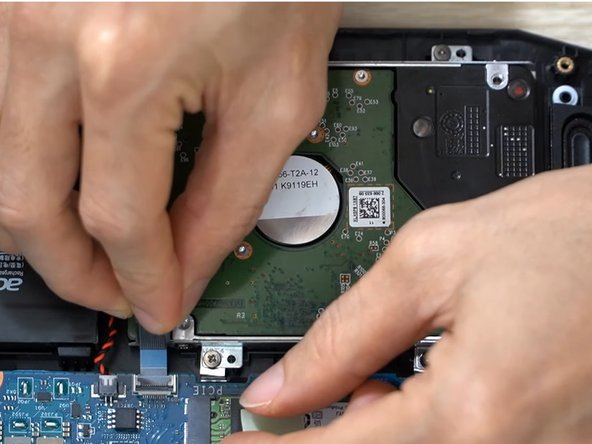
    • Slide the hard drive cable into the connector on the motherboard.

    • Flip the black lock down to secure the cable.

Conclusie

To reassemble your device, follow these instructions in reverse order.

That is all step-to-step on how to Install the new HDD to the laptop Acer Nitro 5 (AN515-55-56GN)

5 andere personen hebben deze handleiding voltooid.

Duy Nguyen

Lid sinds: 09/16/21

253 Reputatie

1 Handleiding geschreven

Team

0 opmerkingen

Voeg opmerking toe

Weergavestatistieken:

Afgelopen 24 uren: 6

Afgelopen 7 dagen: 37

Afgelopen 30 dagen: 189

Altijd: 4,815