Ga door naar hoofdinhoud

Acer Chromebook R11 C738T-C44Z Motherboard Replacement

Wat je nodig hebt

  1. Acer Chromebook R11 C738T-C44Z Motherboard Replacement, Back Cover: stap 1, afbeelding 1 van 3 Acer Chromebook R11 C738T-C44Z Motherboard Replacement, Back Cover: stap 1, afbeelding 2 van 3 Acer Chromebook R11 C738T-C44Z Motherboard Replacement, Back Cover: stap 1, afbeelding 3 van 3
    • Lay the laptop with the back side up.

    • Use a Phillips #1 screwdriver to remove eleven 3 mm screws.

    • Use the opening tool to pry the back cover off gently by placing it in the seam and working your way around the perimeter.

  2. Acer Chromebook R11 C738T-C44Z Motherboard Replacement, Battery: stap 2, afbeelding 1 van 2 Acer Chromebook R11 C738T-C44Z Motherboard Replacement, Battery: stap 2, afbeelding 2 van 2
    • Unplug the battery connector from the motherboard. (The motherboard is a group of wires in rainbow colors)

    • Use a Phillips #1 screwdriver to remove the two 3 mm screws, (one on each side of the battery), that secure it in place.

  3. Acer Chromebook R11 C738T-C44Z Motherboard Replacement: stap 3, afbeelding 1 van 1
    • Remove battery from its holder by pulling it upwards from the device

    • Attempt to remove it as gently as possible to avoid damaging the Motherboard

  4. Acer Chromebook R11 C738T-C44Z Motherboard Replacement: stap 4, afbeelding 1 van 1
    • Install the new battery and again use a Phillips #1 screwdriver to remove the two 3 mm screws

  5. Acer Chromebook R11 C738T-C44Z Motherboard Replacement, Wireless Card: stap 5, afbeelding 1 van 2 Acer Chromebook R11 C738T-C44Z Motherboard Replacement, Wireless Card: stap 5, afbeelding 2 van 2
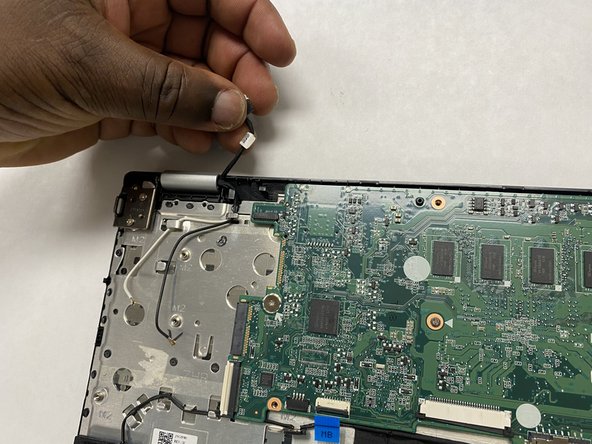
    • Disconnect the two antenna cables (one black and one white) that are attached to the wireless card.

  6. Acer Chromebook R11 C738T-C44Z Motherboard Replacement: stap 6, afbeelding 1 van 1
    • Use a Phillips #1 screwdriver to remove the single 3 mm screw that secures the wireless card.

  7. Acer Chromebook R11 C738T-C44Z Motherboard Replacement: stap 7, afbeelding 1 van 2 Acer Chromebook R11 C738T-C44Z Motherboard Replacement: stap 7, afbeelding 2 van 2
    • Carefully slide the wireless card out of its socket from the motherboard.

  8. Acer Chromebook R11 C738T-C44Z Motherboard Replacement, Motherboard: stap 8, afbeelding 1 van 3 Acer Chromebook R11 C738T-C44Z Motherboard Replacement, Motherboard: stap 8, afbeelding 2 van 3 Acer Chromebook R11 C738T-C44Z Motherboard Replacement, Motherboard: stap 8, afbeelding 3 van 3
    • Disconnect the LED board ribbon by pulling it out gently.

    • Disconnect the speaker cable.

  9. Acer Chromebook R11 C738T-C44Z Motherboard Replacement: stap 9, afbeelding 1 van 2 Acer Chromebook R11 C738T-C44Z Motherboard Replacement: stap 9, afbeelding 2 van 2
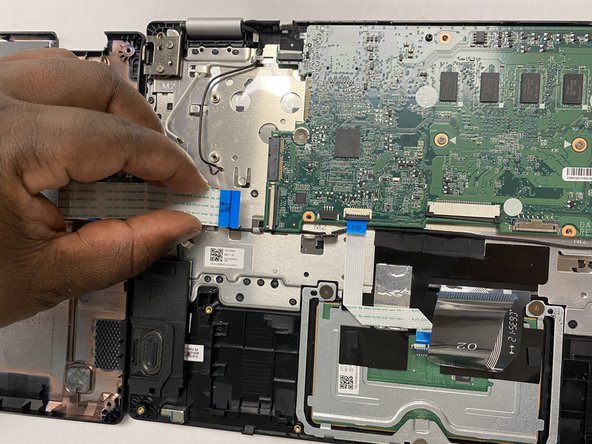
    • Disconnect the keyboard ribbon.

    • Slide it out gently to not rip it.

  10. Acer Chromebook R11 C738T-C44Z Motherboard Replacement: stap 10, afbeelding 1 van 2 Acer Chromebook R11 C738T-C44Z Motherboard Replacement: stap 10, afbeelding 2 van 2
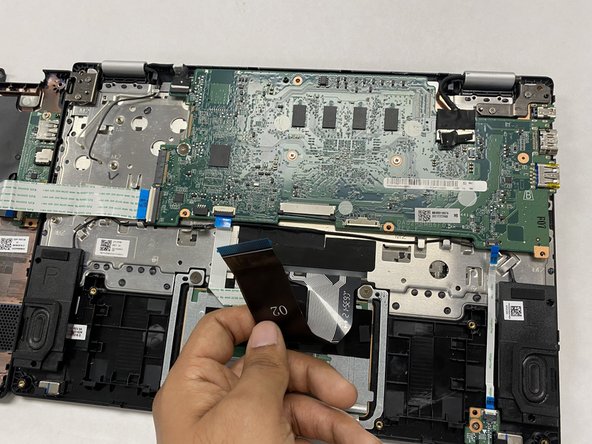
    • Disconnect the daughterboard ribbon by flipping up the white tab and pulling it out from the motherboard.

  11. Acer Chromebook R11 C738T-C44Z Motherboard Replacement: stap 11, afbeelding 1 van 2 Acer Chromebook R11 C738T-C44Z Motherboard Replacement: stap 11, afbeelding 2 van 2
    • Disconnect the touchpad ribbon by lifting up the tab and pulling it out.

  12. Acer Chromebook R11 C738T-C44Z Motherboard Replacement: stap 12, afbeelding 1 van 2 Acer Chromebook R11 C738T-C44Z Motherboard Replacement: stap 12, afbeelding 2 van 2
    • Disconnect the sensor cable by pulling it out.

  13. Acer Chromebook R11 C738T-C44Z Motherboard Replacement: stap 13, afbeelding 1 van 3 Acer Chromebook R11 C738T-C44Z Motherboard Replacement: stap 13, afbeelding 2 van 3 Acer Chromebook R11 C738T-C44Z Motherboard Replacement: stap 13, afbeelding 3 van 3
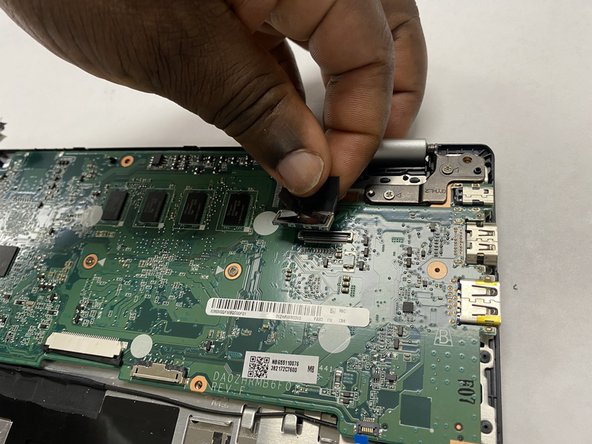
    • Disconnect the LCD cable by pinching it and lifting it off the motherboard.

  14. Acer Chromebook R11 C738T-C44Z Motherboard Replacement: stap 14, afbeelding 1 van 2 Acer Chromebook R11 C738T-C44Z Motherboard Replacement: stap 14, afbeelding 2 van 2
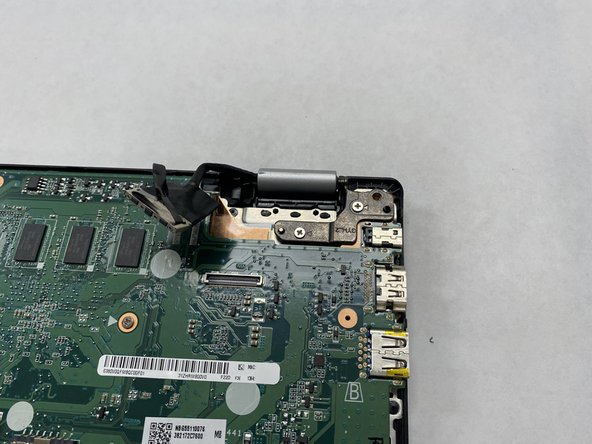
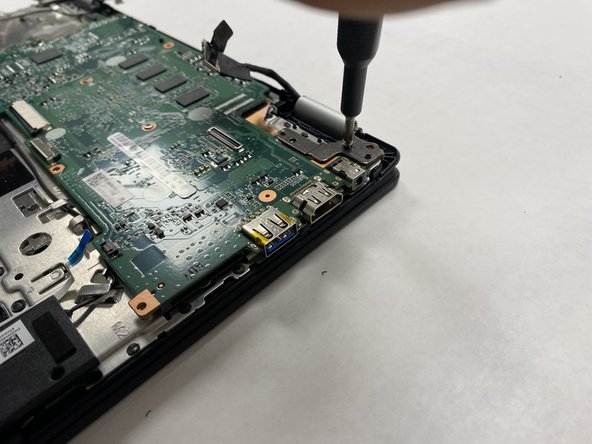
    • Use a Phillips #1 screwdriver to remove the two 3 mm screws that hold the hinge down.

  15. Acer Chromebook R11 C738T-C44Z Motherboard Replacement: stap 15, afbeelding 1 van 3 Acer Chromebook R11 C738T-C44Z Motherboard Replacement: stap 15, afbeelding 2 van 3 Acer Chromebook R11 C738T-C44Z Motherboard Replacement: stap 15, afbeelding 3 van 3
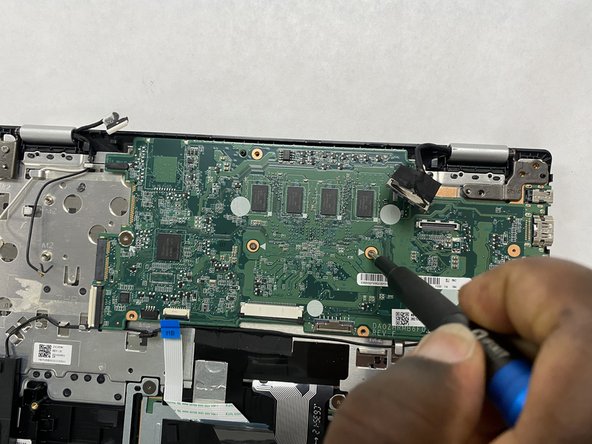
    • Use a Phillips #1 screwdriver to remove the three 3 mm screws that secure the motherboard.

  16. Acer Chromebook R11 C738T-C44Z Motherboard Replacement: stap 16, afbeelding 1 van 2 Acer Chromebook R11 C738T-C44Z Motherboard Replacement: stap 16, afbeelding 2 van 2
    • Slide the opening tool underneath the hinge latch to lift it up.

    • This is to free the motherboard.

  17. Acer Chromebook R11 C738T-C44Z Motherboard Replacement: stap 17, afbeelding 1 van 2 Acer Chromebook R11 C738T-C44Z Motherboard Replacement: stap 17, afbeelding 2 van 2
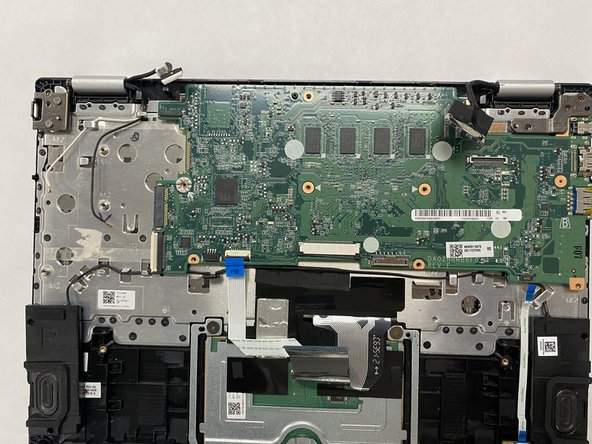
    • Grab the motherboard securely to lift and remove it.

Conclusie

To reassemble your device, follow these instructions in reverse order.

Één andere persoon heeft deze handleiding voltooid.

Connie Hernandez

Lid sinds: 09/01/21

517 Reputatie

4 handleidingen geschreven

Team

Gateway, Team 1-4, Saknee Fall 2021 Lid van Gateway, Team 1-4, Saknee Fall 2021

GCC-SAKNEE-F21S1G4

4 Leden

6 handleidingen geschreven

0 opmerkingen

Voeg opmerking toe

Weergavestatistieken:

Afgelopen 24 uren: 1

Afgelopen 7 dagen: 8

Afgelopen 30 dagen: 25

Altijd: 464