Ga door naar hoofdinhoud

Acer Chromebook CB5-132T-C8ZW USB Port Replacement

Wat je nodig hebt

  1. Acer Chromebook CB5-132T-C8ZW USB Port Replacement, Battery: stap 1, afbeelding 1 van 1
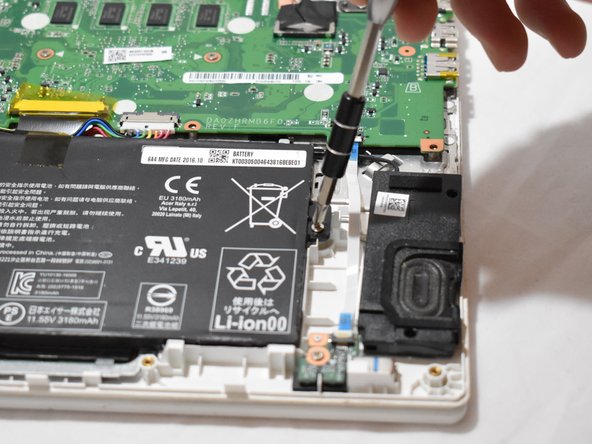
    • Remove eleven 7.2 mm screws from the bottom of the Chromebook using a JIS #1 screwdriver.

  2. Acer Chromebook CB5-132T-C8ZW USB Port Replacement: stap 2, afbeelding 1 van 2 Acer Chromebook CB5-132T-C8ZW USB Port Replacement: stap 2, afbeelding 2 van 2
    • Insert and slightly twist a plastic opening tool to separate and remove the backing of the Chromebook from the body.

    • Do not immediately remove the back from the laptop. The power strip keeps the backing attached to the rest of the laptop. Gently lift backing from the power button side and set next to the body of the laptop.

  3. Acer Chromebook CB5-132T-C8ZW USB Port Replacement: stap 3, afbeelding 1 van 2 Acer Chromebook CB5-132T-C8ZW USB Port Replacement: stap 3, afbeelding 2 van 2
    • Remove two 4.6 mm JIS # screws at each end of the battery.

  4. Acer Chromebook CB5-132T-C8ZW USB Port Replacement: stap 4, afbeelding 1 van 3 Acer Chromebook CB5-132T-C8ZW USB Port Replacement: stap 4, afbeelding 2 van 3 Acer Chromebook CB5-132T-C8ZW USB Port Replacement: stap 4, afbeelding 3 van 3
    • Carefully pull out the ribbon cable attached to the motherboard that runs wires to the battery.

    • Remove the battery.

  5. Acer Chromebook CB5-132T-C8ZW USB Port Replacement, USB Port: stap 5, afbeelding 1 van 2 Acer Chromebook CB5-132T-C8ZW USB Port Replacement, USB Port: stap 5, afbeelding 2 van 2
    • From the back panel, remove one 3.4 mm JIS #1 screw.

  6. Acer Chromebook CB5-132T-C8ZW USB Port Replacement: stap 6, afbeelding 1 van 2 Acer Chromebook CB5-132T-C8ZW USB Port Replacement: stap 6, afbeelding 2 van 2
    • Remove the white connector strip using your fingers.

  7. Acer Chromebook CB5-132T-C8ZW USB Port Replacement: stap 7, afbeelding 1 van 2 Acer Chromebook CB5-132T-C8ZW USB Port Replacement: stap 7, afbeelding 2 van 2
    • Lift the USB port up using a spudger.

    • Remove the USB port with your fingers.

Conclusie

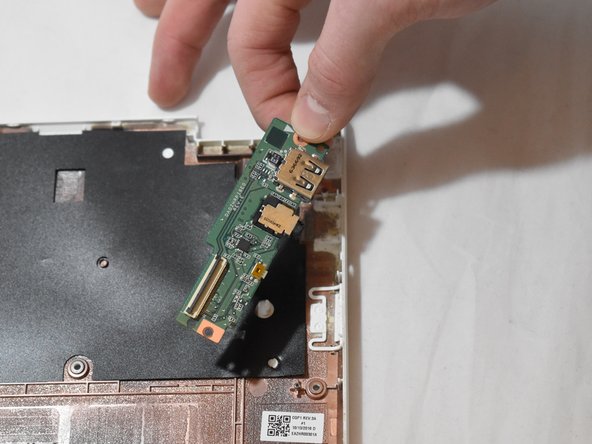
To reassemble your device, follow these instructions in reverse order.

3 andere personen hebben deze handleiding voltooid.

0 opmerkingen

Voeg opmerking toe

Weergavestatistieken:

Afgelopen 24 uren: 0

Afgelopen 7 dagen: 0

Afgelopen 30 dagen: 3

Altijd: 521