Ga door naar hoofdinhoud

Acer Aspire E5-575G-39HV Keyboard Replacement

Wat je nodig hebt

  1. Acer Aspire E5-575G-39HV Keyboard Replacement, Opening the back panel: stap 1, afbeelding 1 van 3 Acer Aspire E5-575G-39HV Keyboard Replacement, Opening the back panel: stap 1, afbeelding 2 van 3 Acer Aspire E5-575G-39HV Keyboard Replacement, Opening the back panel: stap 1, afbeelding 3 van 3
    • Unscrew all 16 screws holding the back panel.

    • Open the HDD, SSD and RAM cover and unscrew all visible screws that hold the panel. Now is a good idea to upgrade those parts if you want.

    • Use a prying tool to separate the top and bottom pieces.

  2. Acer Aspire E5-575G-39HV Keyboard Replacement, The insides.: stap 2, afbeelding 1 van 2 Acer Aspire E5-575G-39HV Keyboard Replacement, The insides.: stap 2, afbeelding 2 van 2
    • Disconnect all visible connectors, starting with the battery (Yellow), they the other ones (Blue). After that remove the screws attaching the motherboard to the panel.

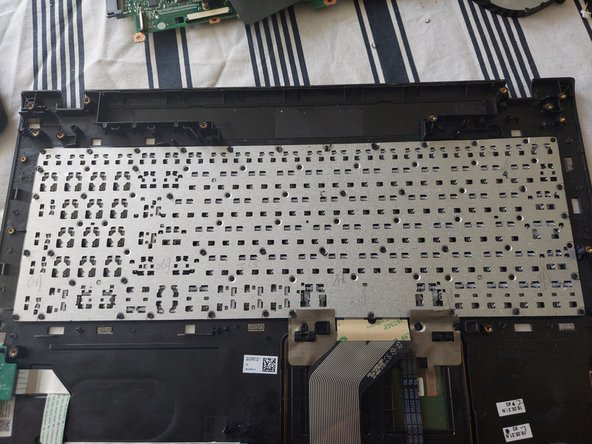
    • After that remove the black protective film, without damaging it. Now the keyboard should be revealed.

  3. Acer Aspire E5-575G-39HV Keyboard Replacement, Removing the display.: stap 3, afbeelding 1 van 3 Acer Aspire E5-575G-39HV Keyboard Replacement, Removing the display.: stap 3, afbeelding 2 van 3 Acer Aspire E5-575G-39HV Keyboard Replacement, Removing the display.: stap 3, afbeelding 3 van 3
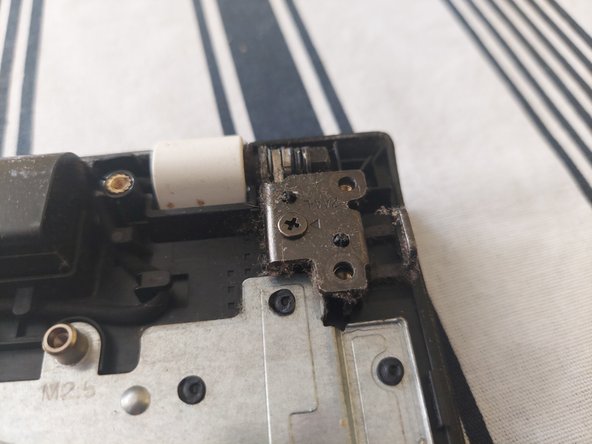
    • Remove the screws that hold the display hinges and detach the display.

  4. Acer Aspire E5-575G-39HV Keyboard Replacement, Removing the old keyboard.: stap 4, afbeelding 1 van 3 Acer Aspire E5-575G-39HV Keyboard Replacement, Removing the old keyboard.: stap 4, afbeelding 2 van 3 Acer Aspire E5-575G-39HV Keyboard Replacement, Removing the old keyboard.: stap 4, afbeelding 3 van 3
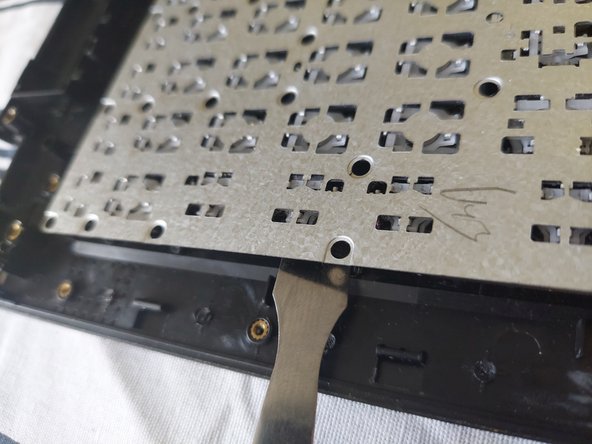
    • Use a soldering iron with a big tip, to melt the plastic rivets that hold the metal case for the keyboard.

    • Use a prying tool the remove the metal case.

    • Remove the old keyboard, place the new one and dont forget to place the metal case on top of it.

Conclusie

To reassemble your device, follow these instructions in reverse order.

Simeon Brankov

Lid sinds: 11/08/20

6.045 Reputatie

49 handleidingen geschreven

0 opmerkingen

Voeg opmerking toe

Weergavestatistieken:

Afgelopen 24 uren: 0

Afgelopen 7 dagen: 2

Afgelopen 30 dagen: 20

Altijd: 607