Inleiding
Does your laptop fan make noise even after cleaning?
Here's how simple it is to change.
Wat je nodig hebt
-
-
Retrieve all Screw's from the bottom of the laptop and organize them into 2 different sets.
-
When removing the back cover gently press on audio connections on the back right of the laptop.
-
-


To reassemble your device, follow these instructions in reverse order.
To reassemble your device, follow these instructions in reverse order.
Annuleren: ik heb deze handleiding niet afgemaakt.
8 andere personen hebben deze handleiding voltooid.

5 opmerkingen
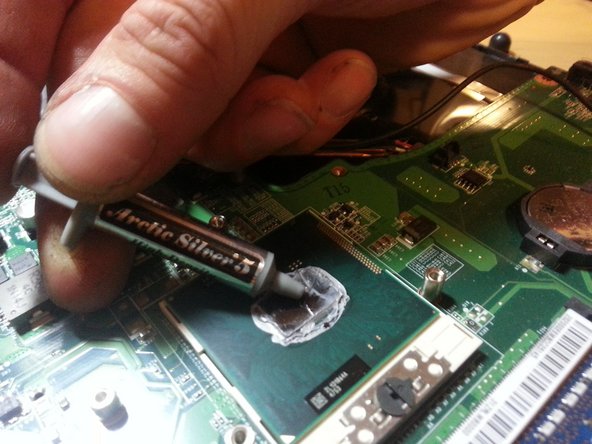
May need to expand the "apply heat paste to center" section. Need to remove old paste first, etc. etc. A good bird's eye view intro, though
Tanks you…
I'll look forward for adding this info.
Seemed like I was going to rip the motherboard up where the usb ports are by the audio connector, why isn't the %#*@ thing screwed down? Lol If I push down by the audio connector like you mention and pull it up from the other side will ot be fine, felt and looked like I might snap the board.
Good job, did have to Emphasis about releasing the audio connectors
I didn't know how to explain better…
Some trick of trade?
Performed on a 5479-6413, several screws that needed to be removed are not indicated in this picture - suffice it to say "remove all visible screws." The hint about the audio jacks was useful, but they are on the bottom right of the photo, the front of the machine not the back.
kurt - Antwoord