Ga door naar hoofdinhoud

Acer Aspire 4810TZ-4120 Fan Replacement

Wat je nodig hebt

  1. Acer Aspire 4810TZ-4120 Fan Replacement, Fan: stap 1, afbeelding 1 van 2 Acer Aspire 4810TZ-4120 Fan Replacement, Fan: stap 1, afbeelding 2 van 2
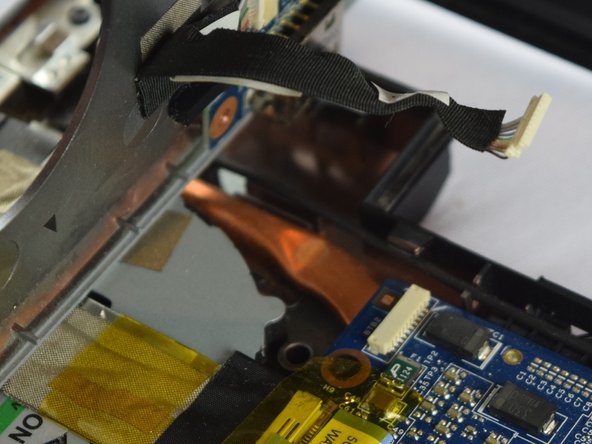
    • Lay the acer upside down

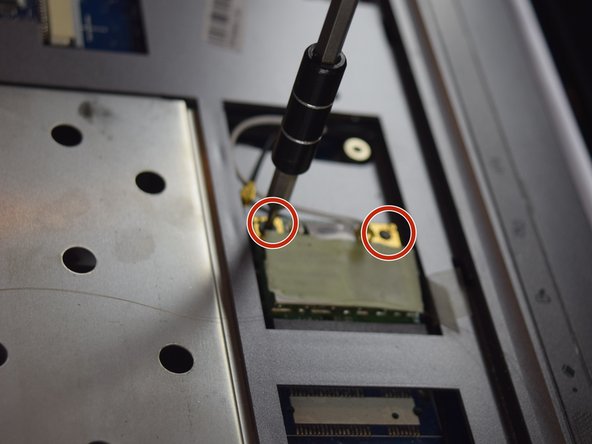
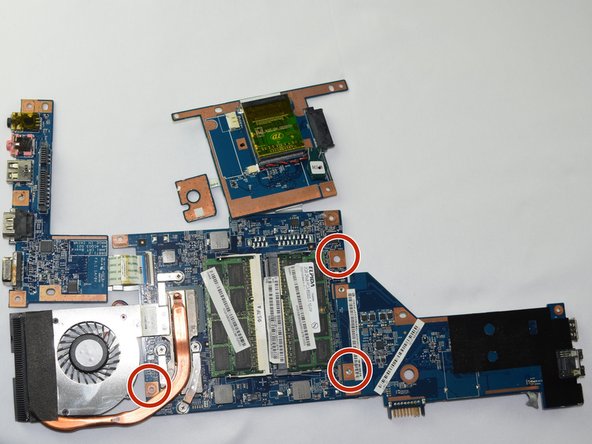
    • Use your screwdriver to unscrew all 19 two 5mm Phillips screws from the case

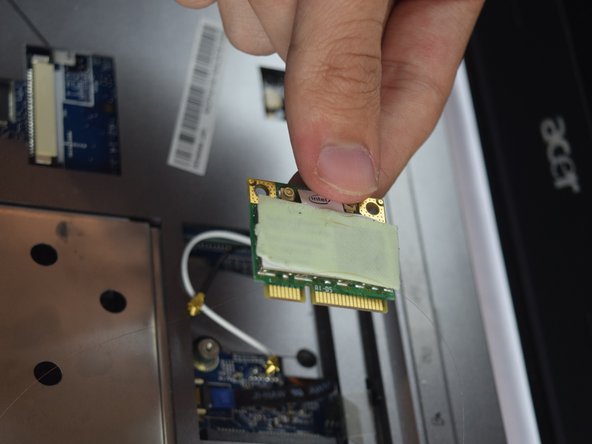
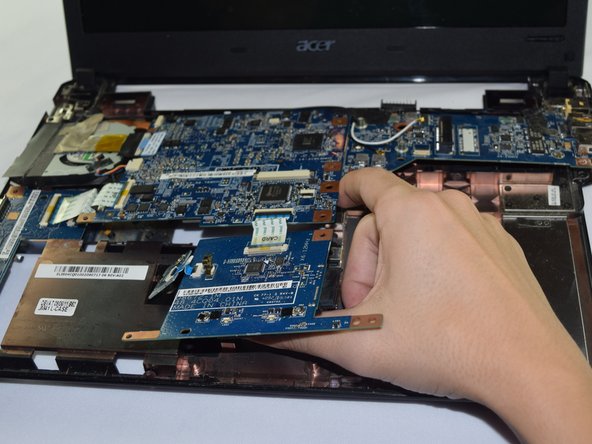
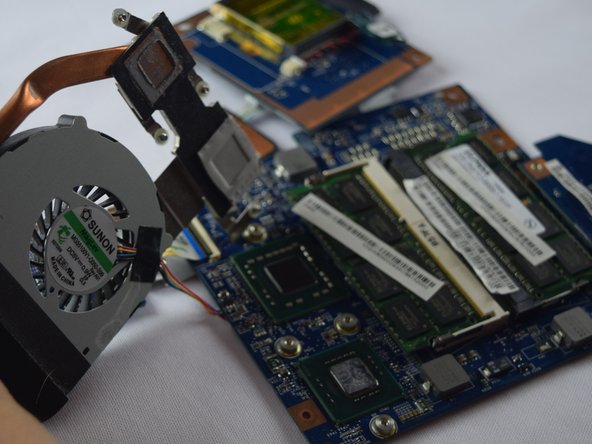
    • After unscrewing all the screws, lift the case upwards and remove it

  2. Acer Aspire 4810TZ-4120 Fan Replacement: stap 2, afbeelding 1 van 3 Acer Aspire 4810TZ-4120 Fan Replacement: stap 2, afbeelding 2 van 3 Acer Aspire 4810TZ-4120 Fan Replacement: stap 2, afbeelding 3 van 3
    • Go on the side of the computer

    • Use the plastic opening tool and press it in between the upper case and lover case

    • When the plastic tool is in between the cases, start going around the computer until both case are officially not connected

  3. Acer Aspire 4810TZ-4120 Fan Replacement: stap 3, afbeelding 1 van 3 Acer Aspire 4810TZ-4120 Fan Replacement: stap 3, afbeelding 2 van 3 Acer Aspire 4810TZ-4120 Fan Replacement: stap 3, afbeelding 3 van 3
    • Get a pair of tweezers

    • Start to detach the wires that are connected to the computer

    • Get a screwdriver and unscrew the screws that are circled in the picture

  4. Acer Aspire 4810TZ-4120 Fan Replacement: stap 4, afbeelding 1 van 3 Acer Aspire 4810TZ-4120 Fan Replacement: stap 4, afbeelding 2 van 3 Acer Aspire 4810TZ-4120 Fan Replacement: stap 4, afbeelding 3 van 3
    • Repeat Step 3 for detaching the rest of the tape

    • Disconnect all wires from the boards

  5. Acer Aspire 4810TZ-4120 Fan Replacement: stap 5, afbeelding 1 van 2 Acer Aspire 4810TZ-4120 Fan Replacement: stap 5, afbeelding 2 van 2
    • Lift up the upper case

    • Disconnect the power supply wiring (the black wire)

  6. Acer Aspire 4810TZ-4120 Fan Replacement: stap 6, afbeelding 1 van 3 Acer Aspire 4810TZ-4120 Fan Replacement: stap 6, afbeelding 2 van 3 Acer Aspire 4810TZ-4120 Fan Replacement: stap 6, afbeelding 3 van 3
    • Remove the three screws

    • Pull the boards upward

    • Flip the boards upside down

    • The screws and the board were removed so that the holes could be better shown

  7. Acer Aspire 4810TZ-4120 Fan Replacement: stap 7, afbeelding 1 van 2 Acer Aspire 4810TZ-4120 Fan Replacement: stap 7, afbeelding 2 van 2
    • Remove the four (4) screws that are holding the CPU's cover on

  8. Acer Aspire 4810TZ-4120 Fan Replacement: stap 8, afbeelding 1 van 2 Acer Aspire 4810TZ-4120 Fan Replacement: stap 8, afbeelding 2 van 2
    • Gently detached the wire that is connected to the computer

Conclusie

To reassemble your device, follow these instructions in reverse order.

Maria Saavedra

Lid sinds: 09/20/17

257 Reputatie

2 handleidingen geschreven

0 opmerkingen

Voeg opmerking toe

Weergavestatistieken:

Afgelopen 24 uren: 0

Afgelopen 7 dagen: 0

Afgelopen 30 dagen: 2

Altijd: 88