Ga door naar hoofdinhoud

ASUS Q302L Display Replacement

Wat je nodig hebt

  1. ASUS Q302L Display Replacement, Back Case: stap 1, afbeelding 1 van 1
    • Make sure the laptop is disconnected from a power supply and is TURNED OFF.

    • Use a Phillips #0 screw driver to remove all ten 10 mm screws around the back of the laptop.

  2. ASUS Q302L Display Replacement: stap 2, afbeelding 1 van 3 ASUS Q302L Display Replacement: stap 2, afbeelding 2 van 3 ASUS Q302L Display Replacement: stap 2, afbeelding 3 van 3
    • Wedge a plastic opening tool under the rear case near the hinge.

    • Pry around the outer edge to release the plastic clips holding the rear case to the laptop.

  3. ASUS Q302L Display Replacement: stap 3, afbeelding 1 van 1
    • Once the cover is free from all the clips, remove the cover from the laptop.

  4. ASUS Q302L Display Replacement, Battery: stap 4, afbeelding 1 van 1
    • Use a Phillips #0 screwdriver and remove all five 5 mm screws securing the battery.

  5. ASUS Q302L Display Replacement: stap 5, afbeelding 1 van 3 ASUS Q302L Display Replacement: stap 5, afbeelding 2 van 3 ASUS Q302L Display Replacement: stap 5, afbeelding 3 van 3
    • Gently wedge a plastic opening tool under the connector.

    • Pry only on the connector not the socket itself or you risk damage to the motherboard.

    • Carefully lift the connector up away from the socket to disconnect it.

  6. ASUS Q302L Display Replacement: stap 6, afbeelding 1 van 2 ASUS Q302L Display Replacement: stap 6, afbeelding 2 van 2
    • Once the screws and connector are removed, simply pull out the battery from its place.

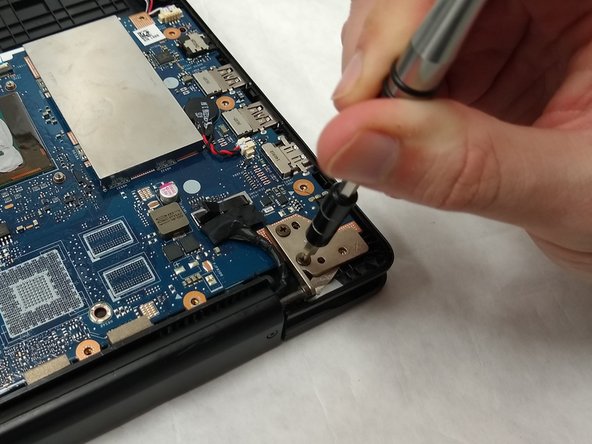
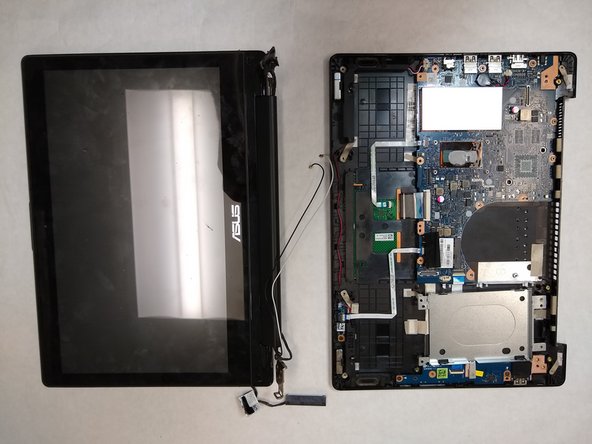
  7. ASUS Q302L Display Replacement, Display: stap 7, afbeelding 1 van 2 ASUS Q302L Display Replacement, Display: stap 7, afbeelding 2 van 2
    • Use a Phillips #00 screw driver to remove the five 10mm screws at the hinges.

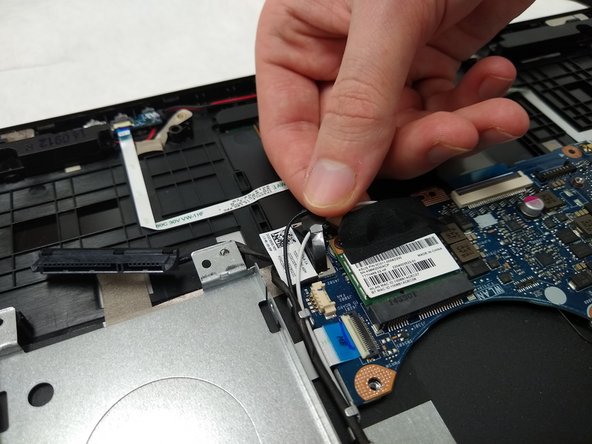
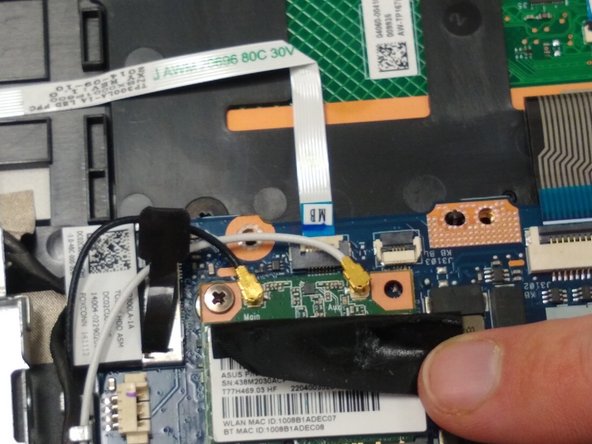
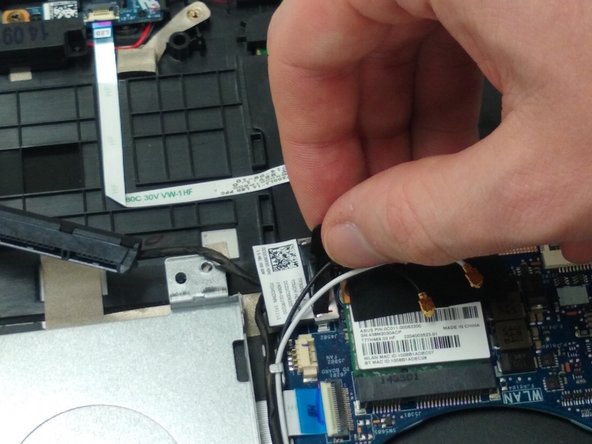
  8. ASUS Q302L Display Replacement: stap 8, afbeelding 1 van 3 ASUS Q302L Display Replacement: stap 8, afbeelding 2 van 3 ASUS Q302L Display Replacement: stap 8, afbeelding 3 van 3
    • Peel back the tape and remove the two connectors.

  9. ASUS Q302L Display Replacement: stap 9, afbeelding 1 van 2 ASUS Q302L Display Replacement: stap 9, afbeelding 2 van 2
    • Pull up on the black tab to remove the connector that connects to the motherboard.

    • Unplug the hard drive cable from the hard drive.

    • Carefully remove the cables from the track that they run through.

  10. ASUS Q302L Display Replacement: stap 10, afbeelding 1 van 2 ASUS Q302L Display Replacement: stap 10, afbeelding 2 van 2
    • Carefully remove the display from the rest of the laptop.

Conclusie

To reassemble your device, follow these instructions in reverse order.

Één andere persoon heeft deze handleiding voltooid.

Nicholas Lozier

Lid sinds: 04/01/19

290 Reputatie

2 handleidingen geschreven

Team

IUPUI, Team S2-G4, Harley Spring 2019 Lid van IUPUI, Team S2-G4, Harley Spring 2019

IUPUI-HARLEY-S19S2G4

3 Leden

2 handleidingen geschreven

0 opmerkingen

Voeg opmerking toe

Weergavestatistieken:

Afgelopen 24 uren: 0

Afgelopen 7 dagen: 5

Afgelopen 30 dagen: 8

Altijd: 1,106