Inleiding
This guide will show you how to fix a misfire or rough idle on your vehicle to ensure and prolong the life of your vehicle's engine. This guide will include:
- Removing the plastic engine cover
- Removing and installing new ignition/coil pack
- Removing old spark plugs
- Gapping and installing new spark plugs
Wat je nodig hebt
-
-
You will find the hood release under the dash board above or next to the left foot rest on your vehicle
-
Now travel to the front of the car where you will now see the hood and the front end of the car where you will have some space between the front bumper and your hood. . (most cars will have a indent on the plastic as an indication of where the hood latch is)
-
Now that you can open the hood fully you will look around the sides of the engine bay to find the hood prop and secure the hood prop into the hole in the hood that is designed to insert the hood prop and maintain the hood open.
-
-
-
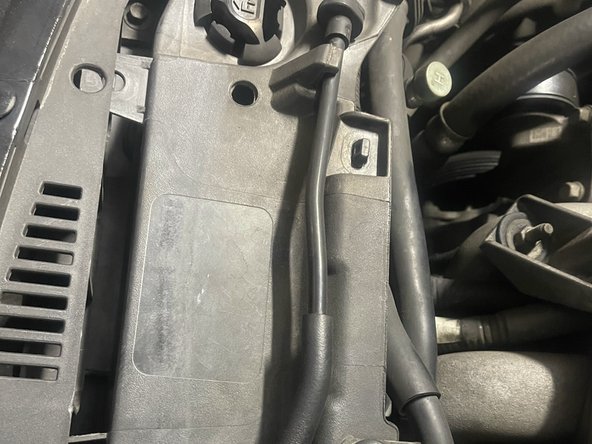
*This may not be applicable to all cars* You will have to examine the cover and look for any tabs that are used to keep it in place. If any are used, you will use your flat head and carefully pry the tab off. Once all the tabs are off you will be able to finally lift and remove the engine cover.
-
-
-
You will now locate the ignition/coil pack so you can remove them, they will look similar to small blocks that sit on top of the engine. When you locate the ignition/coil pack you will see that on one end it has a wire with a clip going into it. You will open the clip by either pushing down on it or pulling up on it.
-
When opening the clip you will pull the wire out of the ignition/ coil pack removing them from each other. Now you will locate the bolt that secures the ignition/coil pack in place.
-
Now that you have found the bolt that secures the ignition/coil pack in place, you will now use the 10mm socket and connect it to the ⅜ ratchet extension and connect that to the ⅜ ratchet. Now you will loosen and remove the bolt securing the ignition/coil pack.
-
Now that the bolt is out you will set it aside in a safe place to prevent losing or place it inside the magnetic tray. Now you will be able to pull out the ignition/coil pack from inside of the engine.
-
*on older vehicles if when removing the coil pack and the bottom rubber part that goes inside of the engine separates from the coil pack you can use needle nose pliers to pull out the rubber part from inside the engine*
-
-
-
-
Once removing the ignition/coil pack you will have the spark plugs exposed, now you can look into the hole from which you pulled the ignition/coil pack from. You will be able to see the top of the spark plugs that you will remove.
-
Now you will insert the 17mm socket onto the ⅜ ratchet extension that's connected to the ⅜ ratchet. Make sure to put the 10mm socket from earlier in a secure place for you to use again later.
-
Once the 17mm socket is on the extension you will insert it into the whole and make sure it goes onto the spark plug. Once its on the spark plug you will begin to turn left to loosen the spark plug. *spark plug may have currision on it, applying force is recommended*
-
-
-
Now that you have all the spark plugs out you will grab your new spark plug and gap it to the correct amount, on average most cars are from 0.020 to 0.040. * look up exact spark plug gapping for your vehicle*. When gapping spark plugs you will insert the bottom part of the spark plug into the gapping tool.
-
You will slide it from the lowest gap and slowly slide it up in number increasing the gap on your spark plug and stop on the recommended gap for your car. Once all spark plugs are gapped you will add a small amount of anti corrosion grease on the threads of the spark plug.
-
Now that the spark plugs have anti corrosion grease you will now insert the new spark plugs into the hole where the old spark plugs were pulled out from.
-
Once they are in you will get your ratchet with the 17mm socket and insert it back in the hole and place it onto the spark plug and begin to turn right to tighten the spark plug back into the engine block.
-
Once the spark plug begins to feel tight you apply less and less pressure and stop when it no longer is easy to turn. Now you will grab our torque wrench and set it to the exact torque recommended for your vehicle. * on average it ranged from 5ft lb to 15ft lb * This will be repeated for all spark plugs.
-
-
-
Now that all the spark plugs are in you will open up the new ignition/coil packs and begin to place them into the spark plug hole. You may have to wiggle the new ignition/coil pack when inserting them into the hole so they can slide into the spark plug correctly.
-
Once all the ignition/coil packs are in you will now grab the bolts you removed and placed to the side or in the magnetic tray and begin to insert them back into the hole where they came out from. You will begin to tighten them to where you can not tighten them easily.
-
hese do not require as much force to stay. You will repeat this for all the ignition/coil packs. Once all ignition/coil packs are bolted down you will grab the wire connection that was removed earlier and insert it back into the ignition/coil pack. Make sure it makes a clip and that how you will know it is all the way in
-
-
-
Now that the job is done you are able to install the plastic engine cover. When installing you want to be careful to not bend or crack it. Once you have it back on you can now slide back in the tabs that were holding it in.
-
Once they clip they are all the way in and you can now grab the hood prop and put it down into its designated slot and close the hood because the job is done.
-


when done you will find that your car no longer has a rough idle or misfire
when done you will find that your car no longer has a rough idle or misfire
Annuleren: ik heb deze handleiding niet afgemaakt.
2 andere personen hebben deze handleiding voltooid.
