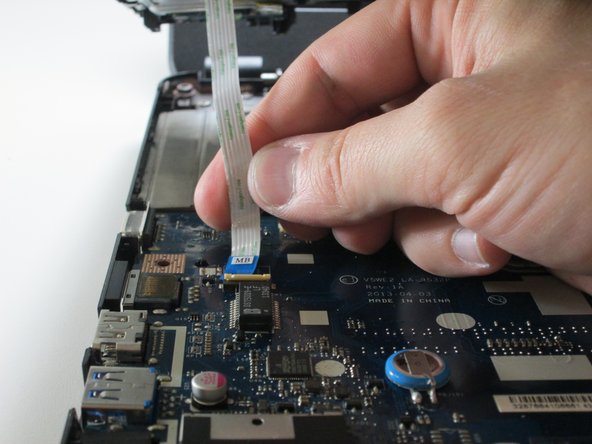
Ga door naar hoofdinhoud

ACER Aspire E1-572-6870 Back Panel Disassembly

Wat je nodig hebt

  1. ACER Aspire E1-572-6870 Back Panel Disassembly, Battery: stap 1, afbeelding 1 van 1
    • Before you begin, be sure to turn off your laptop and unplug it from the outlet.

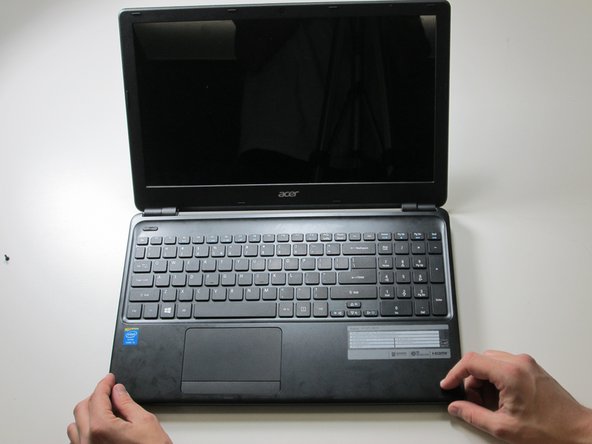
    • Flip your laptop over so the back panel is facing upwards.

    • Locate the lock switch below the battery.

  2. ACER Aspire E1-572-6870 Back Panel Disassembly: stap 2, afbeelding 1 van 3 ACER Aspire E1-572-6870 Back Panel Disassembly: stap 2, afbeelding 2 van 3 ACER Aspire E1-572-6870 Back Panel Disassembly: stap 2, afbeelding 3 van 3
    • Slide the lock switch to the right using your finger or a spudger.

    • At the same time, grasp the battery with your other hand and slide it out of the laptop.

    • Remove the battery.

    • To reinsert or replace the battery, simply line up the tabs on the battery with the laptop and slide it straight back in. There is no need to move the lock switch.

  3. ACER Aspire E1-572-6870 Back Panel Disassembly, Back Panel: stap 3, afbeelding 1 van 2 ACER Aspire E1-572-6870 Back Panel Disassembly, Back Panel: stap 3, afbeelding 2 van 2
    • Remove the 16 2.5 x 8mm Phillips #0 screws from the back panel.

  4. ACER Aspire E1-572-6870 Back Panel Disassembly: stap 4, afbeelding 1 van 3 ACER Aspire E1-572-6870 Back Panel Disassembly: stap 4, afbeelding 2 van 3 ACER Aspire E1-572-6870 Back Panel Disassembly: stap 4, afbeelding 3 van 3
    • Remove the back panel by carefully disengaging it around the edges and then pull upwards.

  5. ACER Aspire E1-572-6870 Back Panel Disassembly: stap 5, afbeelding 1 van 1
    • Unscrew the two remaining 2.5 x 8mm Phillips #0 screws from inside the bottom panel as designated in the image.

  6. ACER Aspire E1-572-6870 Back Panel Disassembly: stap 6, afbeelding 1 van 2 ACER Aspire E1-572-6870 Back Panel Disassembly: stap 6, afbeelding 2 van 2
    • Slide out the plastic insert located on the left side, and remove, before returning the laptop to the face-up position.

  7. ACER Aspire E1-572-6870 Back Panel Disassembly: stap 7, afbeelding 1 van 3 ACER Aspire E1-572-6870 Back Panel Disassembly: stap 7, afbeelding 2 van 3 ACER Aspire E1-572-6870 Back Panel Disassembly: stap 7, afbeelding 3 van 3
    • Carefully flip your laptop back over and open it up.

  8. ACER Aspire E1-572-6870 Back Panel Disassembly: stap 8, afbeelding 1 van 3 ACER Aspire E1-572-6870 Back Panel Disassembly: stap 8, afbeelding 2 van 3 ACER Aspire E1-572-6870 Back Panel Disassembly: stap 8, afbeelding 3 van 3
    • Carefully detach the top panel of the laptop and slowly lift it up to reveal the internal components.

  9. ACER Aspire E1-572-6870 Back Panel Disassembly: stap 9, afbeelding 1 van 2 ACER Aspire E1-572-6870 Back Panel Disassembly: stap 9, afbeelding 2 van 2
    • Locate the three ribbons that need to be unplugged, so the two halves of the device may be separated.

    • Unplug the large ribbon by sliding the retainer clip backward (toward the hinges), then gently pulling the cable out of the connector.

  10. ACER Aspire E1-572-6870 Back Panel Disassembly: stap 10, afbeelding 1 van 3 ACER Aspire E1-572-6870 Back Panel Disassembly: stap 10, afbeelding 2 van 3 ACER Aspire E1-572-6870 Back Panel Disassembly: stap 10, afbeelding 3 van 3
    • Remove the other two smaller ribbons by flipping open the small plastic tab that holds the ribbon in the connector.

    • Then simply pull the free ribbon out.

  11. ACER Aspire E1-572-6870 Back Panel Disassembly: stap 11, afbeelding 1 van 2 ACER Aspire E1-572-6870 Back Panel Disassembly: stap 11, afbeelding 2 van 2
    • Lift the top panel all the way up and your laptop is now split into its two distinct halves.

Conclusie

To reassemble your device, follow these instructions in reverse order.

2 andere personen hebben deze handleiding voltooid.

Cody Lim

Lid sinds: 01/25/17

1.404 Reputatie

7 handleidingen geschreven

Team

Cal Poly, Team 9-6, Banghart Winter 2017 Lid van Cal Poly, Team 9-6, Banghart Winter 2017

CPSU-BANGHART-W17S9G6

3 Leden

7 handleidingen geschreven

Één opmerking

Muito bem explicado!

cristianomrodrigues - Antwoord

Voeg opmerking toe

Weergavestatistieken:

Afgelopen 24 uren: 1

Afgelopen 7 dagen: 6

Afgelopen 30 dagen: 30

Altijd: 10,920