Ga door naar hoofdinhoud

8BitDo SN30 Pro+ Controller Rumble Motors Replacement

Wat je nodig hebt

  1. 8BitDo SN30 Pro+ Controller Rumble Motors Replacement, Remove Battery: stap 1, afbeelding 1 van 3 8BitDo SN30 Pro+ Controller Rumble Motors Replacement, Remove Battery: stap 1, afbeelding 2 van 3 8BitDo SN30 Pro+ Controller Rumble Motors Replacement, Remove Battery: stap 1, afbeelding 3 van 3
    • Place the controller face down.

    • Remove the battery cover.

    • Remove rechargeable battery or AA batteries.

  2. 8BitDo SN30 Pro+ Controller Rumble Motors Replacement, Remove Trigger Buttons: stap 2, afbeelding 1 van 2 8BitDo SN30 Pro+ Controller Rumble Motors Replacement, Remove Trigger Buttons: stap 2, afbeelding 2 van 2
    • Remove L2 and R2 trigger buttons by pushing them away from the grips.

  3. 8BitDo SN30 Pro+ Controller Rumble Motors Replacement, Remove Screws: stap 3, afbeelding 1 van 2 8BitDo SN30 Pro+ Controller Rumble Motors Replacement, Remove Screws: stap 3, afbeelding 2 van 2
    Gereedschap gebruikt in deze stap:
    Tweezers
    $4.99
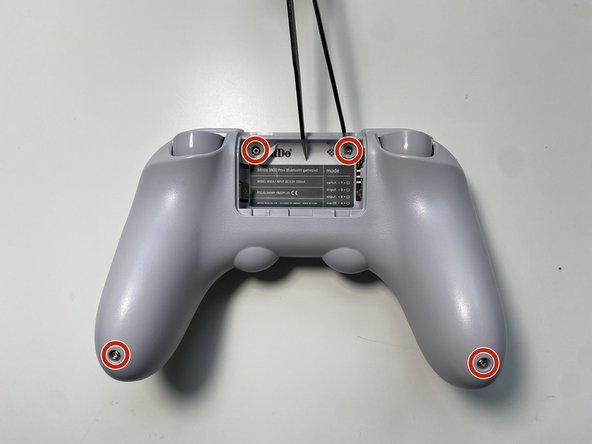
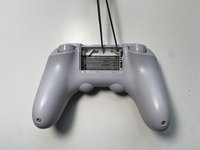
    • Use Tweezers to uncover two screws under the label in the battery compartment.

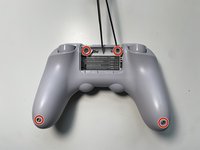
    • Use a T6 screwdriver to remove the four 7.3 mm screws securing the rear cover.

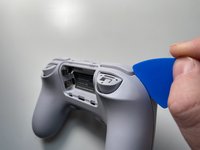
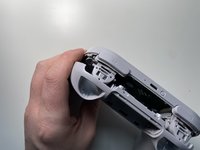
  4. 8BitDo SN30 Pro+ Controller Rumble Motors Replacement, Unclip Covers: stap 4, afbeelding 1 van 3 8BitDo SN30 Pro+ Controller Rumble Motors Replacement, Unclip Covers: stap 4, afbeelding 2 van 3 8BitDo SN30 Pro+ Controller Rumble Motors Replacement, Unclip Covers: stap 4, afbeelding 3 van 3
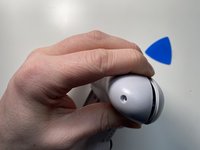
    • At the end of each grip, pry apart the covers.

    • Use fingernail or opening pick to undo the two top clips.

    • One clip next to L button.

    • One clip next to R button

    • Undo the final clip between the joysticks.

  5. 8BitDo SN30 Pro+ Controller Rumble Motors Replacement, Separate Covers: stap 5, afbeelding 1 van 1
    • Carefully move the rear cover away and from the front cover. Place it to the left.

    • Do not completely separate. The two halves are still attached via a white ribbon cable.

  6. 8BitDo SN30 Pro+ Controller Rumble Motors Replacement, Remove Ribbon Cable: stap 6, afbeelding 1 van 3 8BitDo SN30 Pro+ Controller Rumble Motors Replacement, Remove Ribbon Cable: stap 6, afbeelding 2 van 3 8BitDo SN30 Pro+ Controller Rumble Motors Replacement, Remove Ribbon Cable: stap 6, afbeelding 3 van 3
    • Unlock the ribbon cable by push open the black plastic tab.

    • The tab will slide about 1.5mm

    • Pull the ribbon cable out of the connector in the direction of the cable.

  7. 8BitDo SN30 Pro+ Controller Rumble Motors Replacement, Remove Caps: stap 7, afbeelding 1 van 2 8BitDo SN30 Pro+ Controller Rumble Motors Replacement, Remove Caps: stap 7, afbeelding 2 van 2
    • Grab the top and pull straight up on the joystick cap. Pulling out the caps one-by-one.

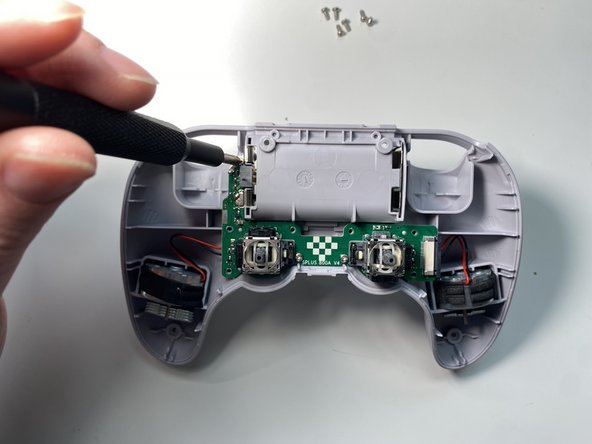
  8. 8BitDo SN30 Pro+ Controller Rumble Motors Replacement, Remove Screws: stap 8, afbeelding 1 van 3 8BitDo SN30 Pro+ Controller Rumble Motors Replacement, Remove Screws: stap 8, afbeelding 2 van 3 8BitDo SN30 Pro+ Controller Rumble Motors Replacement, Remove Screws: stap 8, afbeelding 3 van 3
    • Use a Phillips screwdriver to remove the nine 5.2 mm screws securing the rear circuit board.

    • Four around the Right stick

    • Four around the Left stick

    • One next to the Battery connector

  9. 8BitDo SN30 Pro+ Controller Rumble Motors Replacement, Separate Rear Board: stap 9, afbeelding 1 van 3 8BitDo SN30 Pro+ Controller Rumble Motors Replacement, Separate Rear Board: stap 9, afbeelding 2 van 3 8BitDo SN30 Pro+ Controller Rumble Motors Replacement, Separate Rear Board: stap 9, afbeelding 3 van 3
    • Pull the two rumble motors out of their housings.

    • Grab the analog sticks to pull out the circuit board

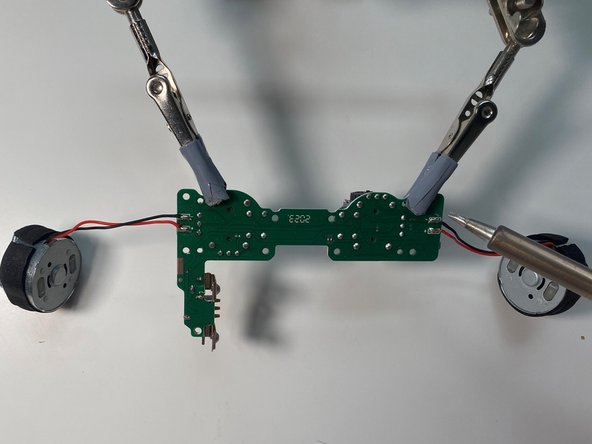
  10. 8BitDo SN30 Pro+ Controller Rumble Motors Replacement, Desolder Rumble Motors: stap 10, afbeelding 1 van 3 8BitDo SN30 Pro+ Controller Rumble Motors Replacement, Desolder Rumble Motors: stap 10, afbeelding 2 van 3 8BitDo SN30 Pro+ Controller Rumble Motors Replacement, Desolder Rumble Motors: stap 10, afbeelding 3 van 3
    • Flip over the rear board

    • Using a soldering iron to desolder the rumble motor wires.

    • During reassembly, remember to solder the wires back into the same position.

Conclusie

To reassemble your device, follow these instructions in reverse order.

Één andere persoon heeft deze handleiding voltooid.

Brian W

Lid sinds: 12/21/11

1.692 Reputatie

8 handleidingen geschreven

0Gids Commentaar

Voeg opmerking toe

Weergavestatistieken:

Afgelopen 24 uren: 1

Afgelopen 7 dagen: 6

Afgelopen 30 dagen: 15

Altijd: 633