Ga door naar hoofdinhoud

2013-2016 Scion FRS (Toyota gt86) Engine Air Filter Replacement

Wat je nodig hebt

  1. 2013-2016 Scion FRS (Toyota gt86)  Engine Air Filter Replacement, Engine Air Filter: stap 1, afbeelding 1 van 3 2013-2016 Scion FRS (Toyota gt86)  Engine Air Filter Replacement, Engine Air Filter: stap 1, afbeelding 2 van 3 2013-2016 Scion FRS (Toyota gt86)  Engine Air Filter Replacement, Engine Air Filter: stap 1, afbeelding 3 van 3
    • Pull the handle located near the driver's left leg to unlock the hood.

    • Pull the secondary latch located to the right of the emblem.

    • Prop up the hood.

    • Make sure you're not working in a high wind area, as that might blow the hood backward and damage your vehicle.

  2. 2013-2016 Scion FRS (Toyota gt86)  Engine Air Filter Replacement: stap 2, afbeelding 1 van 1
    • Locate the air filter box, which can be found to the front right of the car.

  3. 2013-2016 Scion FRS (Toyota gt86)  Engine Air Filter Replacement: stap 3, afbeelding 1 van 3 2013-2016 Scion FRS (Toyota gt86)  Engine Air Filter Replacement: stap 3, afbeelding 2 van 3 2013-2016 Scion FRS (Toyota gt86)  Engine Air Filter Replacement: stap 3, afbeelding 3 van 3
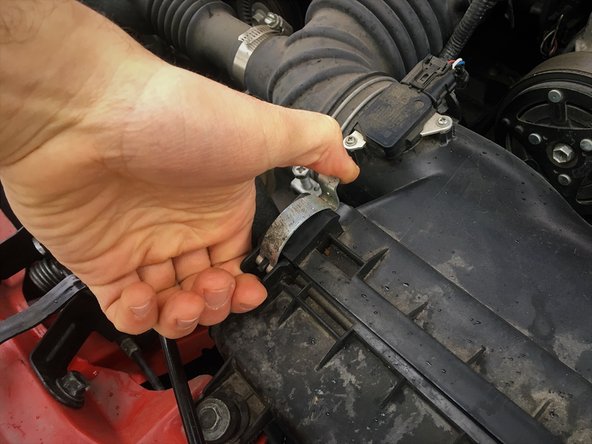
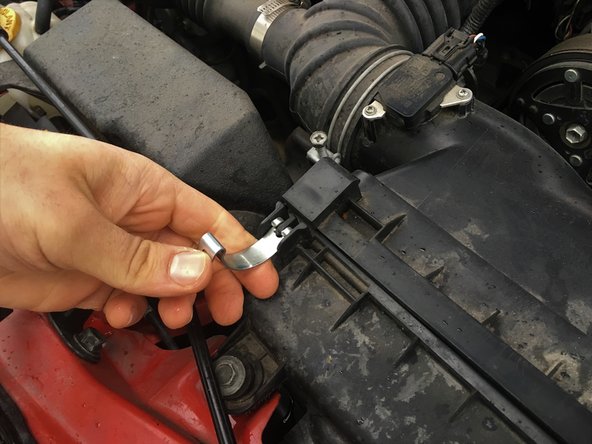
    • Pull the metal clips up from the top. They will pop out.

  4. 2013-2016 Scion FRS (Toyota gt86)  Engine Air Filter Replacement: stap 4, afbeelding 1 van 3 2013-2016 Scion FRS (Toyota gt86)  Engine Air Filter Replacement: stap 4, afbeelding 2 van 3 2013-2016 Scion FRS (Toyota gt86)  Engine Air Filter Replacement: stap 4, afbeelding 3 van 3
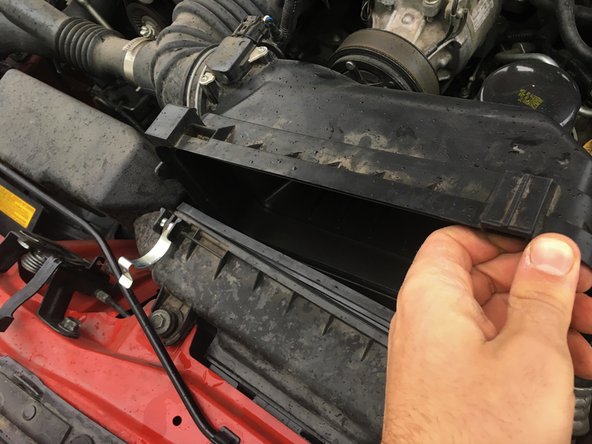
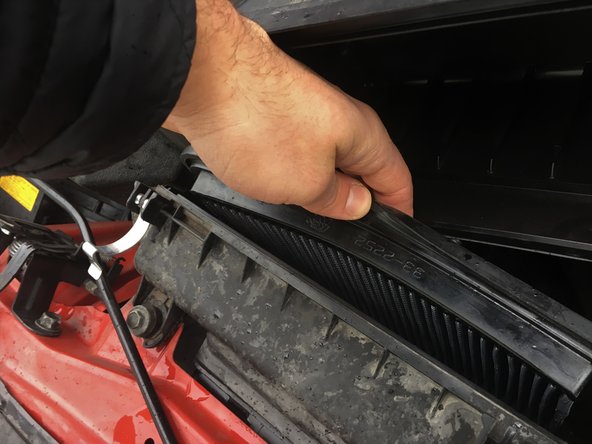
    • Grab the back of the box and pull it towards the top.

    • To pull out the air-filter, simply pull it away from the car and lift up.

  5. 2013-2016 Scion FRS (Toyota gt86)  Engine Air Filter Replacement: stap 5, afbeelding 1 van 1
    • Repeat the process in reverse to install the air filter.

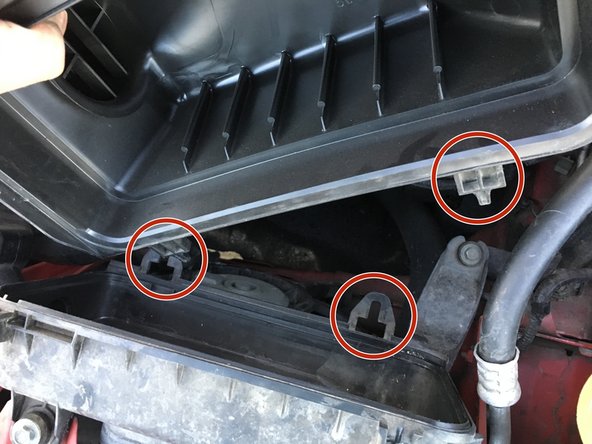
    • Make sure that the tabs on the filter are on the bottom.

  6. 2013-2016 Scion FRS (Toyota gt86)  Engine Air Filter Replacement: stap 6, afbeelding 1 van 1
    • Line up the little pins on the cover of the box with the base of the box in order to close it.

    • Clip the pins back in and you're done!

Conclusie

Now that the new filter is installed, you're good to go.

Mark Symonenko

Lid sinds: 09/25/18

133 Reputatie

1 Handleiding geschreven

0 opmerkingen

Voeg opmerking toe

Weergavestatistieken:

Afgelopen 24 uren: 3

Afgelopen 7 dagen: 13

Afgelopen 30 dagen: 42

Altijd: 2,694