Deze versie kan foutieve bewerkingen bevatten. Schakel over naar de recentste gecontroleerde momentopname.
Wat je nodig hebt
-
Deze stap is niet vertaald. Help het te vertalen
-
Take a look at the belt routing diagram under the hood. If you didn't find it you can find a picture on the internet or draw one before beginning.
-
-
Deze stap is niet vertaald. Help het te vertalen
-
look carefully at how the old belt wraps around the pulleys, so you can replace the new one by practicing and matching the routing.
-
A/C Pulley
-
Tensioner
-
Idler Pulley
-
Crankshaft Pulley
-
Power Steering Pump Pulley
-
Generator Pulley
-
Water Pump Pulley
-
-
-
Deze stap is niet vertaald. Help het te vertalen
-
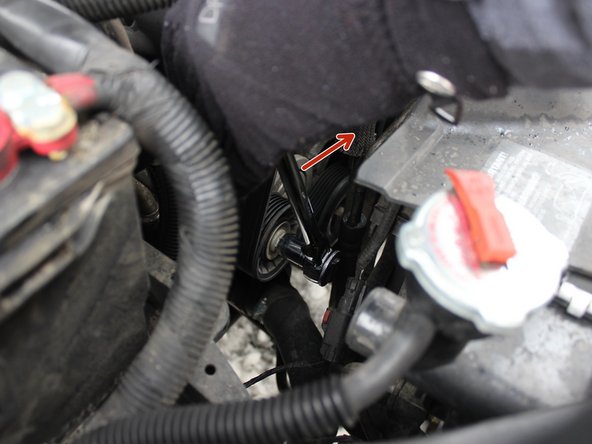
Now, use your 16 mm wrench to reduce the belt tension and get it off.
-
Put the socket wrench on the tensioner (Right your belt tensioner, the little square or cave).
-
-
Deze stap is niet vertaald. Help het te vertalen
-
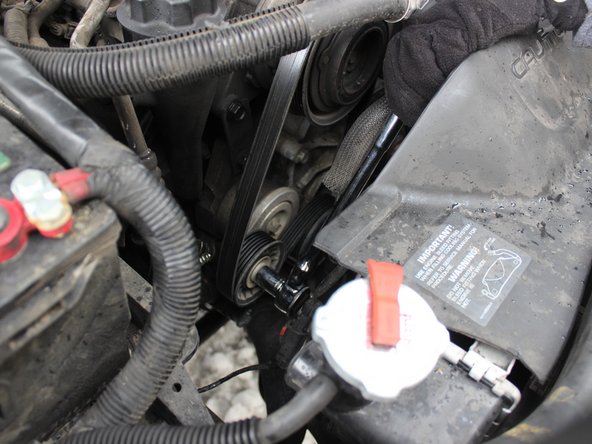
Remove the old belt and make sure to put the new belt that doesn't have any cracks and looks smooth.
-
-
Deze stap is niet vertaald. Help het te vertalen
-
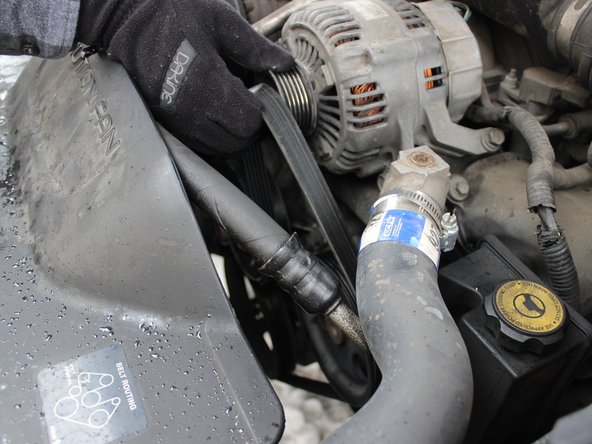
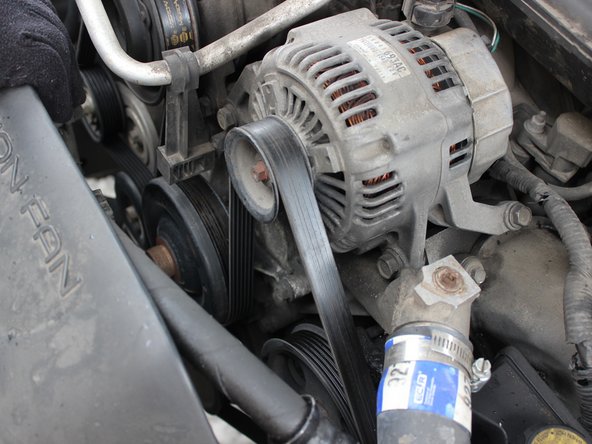
Install the new belt by lining up all belt ribs in the pulley grooves and wrap it around.
-
Start with the A/C Pulley and then wrap it around the tensioner and move on until you end up with the water pump pulley.
-
-
Deze stap is niet vertaald. Help het te vertalen
-
Make sure at the end to tighten the tensioner and start your car to make sure it's work!
-


Annuleren: ik heb deze handleiding niet afgemaakt.
2 andere personen hebben deze handleiding voltooid.

Team

Eastern Washington University, Team S27-G1, Munoz Winter 2019 Lid van Eastern Washington University, Team S27-G1, Munoz Winter 2019
EWU-MUNOZ-W19S27G1
1 Lid
1 handleiding geschreven