Inleiding
Een vasthangende toets in je toetsenbord is een probleem dat vaak voorkomt bij MacBook-laptops, meestal nadat men er vloeistoffen of kruimeltjes op laat vallen. Dit zorgt ervoor dat je toetsen blijven vasthangen. Gelukkig is dit gemakkelijk op te lossen met behulp van deze handleiding.
Als het poetsen van je toetsenbord niet helpt, is het ook goed om te weten dat iFixit ook MacBook Pro Keyboards, en MacBook Air Keyboards verkoopt.
Wat je nodig hebt
-
-
Schakel je toestel uit voordat je begint met deze procedure.
-
Klik op het Apple-logo in de linkerbovenhoek.
-
Klik in het menu dat verschijnt op 'Zet uit...'.
-
-
-
-
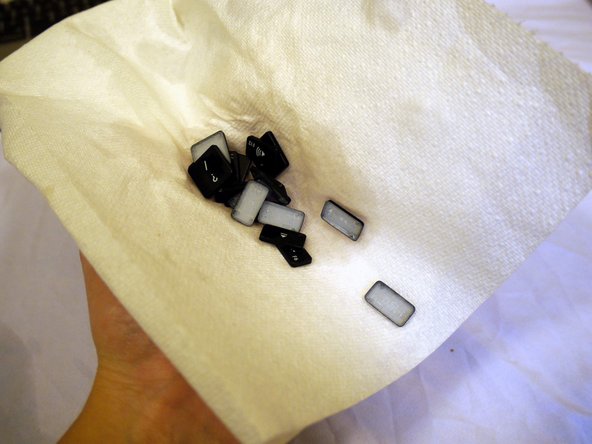
Als je de toetsen eraf haalt en een van deze witte plastic onderdeeltjes komt mee, maak je dan geen zorgen. Dit zijn de toetsendragers en zijn relatief makkelijk terug te plaatsen.
-
Als er maar een van deze deeltjes mee uitkwam, haal dan het andere onderdeel uit de laptop.
-
Kijk naar de tweede foto om de twee onderdelen samen te voegen. Wanneer deze uitgelijnd zijn druk je tot je een zacht klikgeluid hoort.
-
Duw de gecombineerde dragers terug in het toetsenbord, op de plaats waar ze eruit gekomen zijn.
-


Hopelijk heb je nu het vastzittende toetsprobleem op je MacBook opgelost. Het is een goed idee om zo nu en dan je toetsenbord schoon te maken en te onderhouden. iFixit's Electronica Schoonmaakset en Precisie Schoonmaakset zijn fantastisch voor het voorkomen van vastzittende toetsen en in het spic en span houden van je electronica.
Hopelijk heb je nu het vastzittende toetsprobleem op je MacBook opgelost. Het is een goed idee om zo nu en dan je toetsenbord schoon te maken en te onderhouden. iFixit's Electronica Schoonmaakset en Precisie Schoonmaakset zijn fantastisch voor het voorkomen van vastzittende toetsen en in het spic en span houden van je electronica.
Annuleren: ik heb deze handleiding niet afgemaakt.
176 andere personen hebben deze handleiding voltooid.
Met dank aan deze vertalers:
100%


Deze vertalers helpen ons de wereld te repareren! Wil je bijdragen?
Begin met vertalen ›
Team

Cal Poly, Team 24-6, Green Winter 2015 Lid van Cal Poly, Team 24-6, Green Winter 2015
CPSU-GREEN-W15S24G6
4 Leden
15 handleidingen geschreven
56 opmerkingen
YOU ROCK THANK YOU
(I'm going to type "S" a few times to demonstrate how well this helped me!
SSSSSsssssssssssssSSSSSSSSSSSSSSSsssssSSS
Ugh it frustrates me that the author doesn't comprehensibly guide you through the complexities of taking keys off and on your keyboard. They are delicate and fit together elegantly. You should really elaborate before going and telling people to yank their keys off.
I disagree. He specified what to use, how to put them back on, etc. It's clear and precise!
Anyway I'm going to try this tonight so we'll see how it goes!
kaymay -
Actually it’s really not clear. If the key carriers come off and you don’t see how they were originally in the keyboard then there’s a huge amount of possible combinations as to which way around they could go. The author actually says “refer to the second picture to see how they go together” and then FORGOT TO UPLOAD THAT PICTURE ! You may have been lucky, but as many times as I’ve done this, it’s still a nightmare to figure out exactly which way around and which way up these little pieces go together. You may be lucky and get it right, or you may get it wrong but it’s still “good enough” or you may get it wrong and the key will never quite work the same again and you’ll end up taking it to a shop to replace the whole %#*@ keyboard for some ridiculous price because the author didn’t proof-read this article better and actually include the pictures that he said to refer to !