Ga door naar hoofdinhoud

Repair and disassembly information for amplifiers in home audio systems.

117 Vragen Bekijk alle

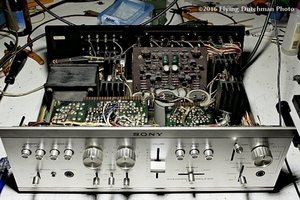
Maintenance of an old but very good Amplifier

Hi, is there anybody that can teach me how to maintain and old amplifier. Understand when a capacitor is good or not, where and what to clean... this kind of stuff. Thanks a lot in advance

Beantwoord! Bekijk het antwoord Dit probleem heb ik ook

Is dit een goede vraag?

Score 6
2 opmerkingen

@taquim what make and model is your amp?

door

Voeg een opmerking toe

2 Antwoorden

Gekozen oplossing

A typical maintenance job on an old Hifi amp would involve the following:

  • Safety First: Unplug the amp from the mains before removing the cover!
  • Dust: Use a brush and a vacuum cleaner to remove dust. Some people would use compressed air, but I tend to disagree - compressed air often blows dust into nooks and crannies where it will be more difficult to remove.
  • Crackles, Pops, an Intermittents: Clean switches and pots with a good contact cleaner. I recommend Kontakt 60. Don't use any cheap, off brand contact cleaner - it may do more harm than good. DO NOT USE WD-40!!! Apply the contact cleaner very sparingly spraying it into pots and switches through the small openings in their covers. Exercise the controls by briskly turning them from one end stop to the other several times (for pots and rotary switches) or pushing/flipping them a number of times in quick succession (toggles and pushbuttons). Some pots and switches are sealed and cannot be cleaned. Exercising them a bit usually clears any problems they might have. Note many amps have rotary selectors that are actually slide switches located on a circuit board distant from the front panel and actuated by a flexible strip that works a bit like a Bowden cable. If the amp has a headphone socket, spray a bit of contact cleaner into it and insert/remove a headphone plug a few times.
  • Caps: Leave them alone unless there are obvious problems. I know recapping is all the rage these days, but I notice most caps in vintage hifi amps hold up surprisingly well.
  • Signal connectors: The RCA type connectors on the rear panel can be effectively cleaned by wetting them with a drop of contact cleaner, inserting a loose plug and turning the plug back and forth a quarter turn a few times.
  • Adjustment: Bias current and DC offset may drift over time, but adjustment should be left to a qualified technician. Misadjustment might blow up your amp, so leave those trim pots alone! If the amp makes a loud-ish thump on your speakers when you turn it on or runs hot when idle, have it checked. Except if the amp is advertised as being Class A (usually written on the front panel), 'cause Class A amps do run hot just sittin' there doin' nothing.

Here's a 1975 vintage Sony TA-1140 getting a tune-up:

Block Image

Was dit antwoord nuttig?

Score 14

4 opmerkingen:

great description, thanks a lot. Can i use the same "procedures" for separated "pre" and "final" amplifier? Thanks again

door

Obviously you can. After all, integrated amps like the one in the pic are just preamp and power amp in a single enclosure, the essence is the same.

door

Yes they get dusty inside. I used compressed air once seemed to work okay

door

Very helpful! Thanks

door

Voeg een opmerking toe

What about the solder joints they heat up in time and crack.

They will need to be redone or it will cause a short..

Was dit antwoord nuttig?

Score 0
Voeg een opmerking toe

Voeg je antwoord toe

Giovanni Avila zal eeuwig dankbaar zijn.
Weergavestatistieken:

Afgelopen 24 uren: 2

Afgelopen 7 dagen: 11

Afgelopen 30 dagen: 76

Altijd: 17,209